> ## Documentation Index
> Fetch the complete documentation index at: https://docs.tracecat.com/llms.txt
> Use this file to discover all available pages before exploring further.
# Dropdowns
> Add custom case classifications such as determination, escalation tier, or detection source, and filter the case list by them.
Enterprise Edition
Dropdowns add workspace-specific properties to every case, next to status, priority, and severity.
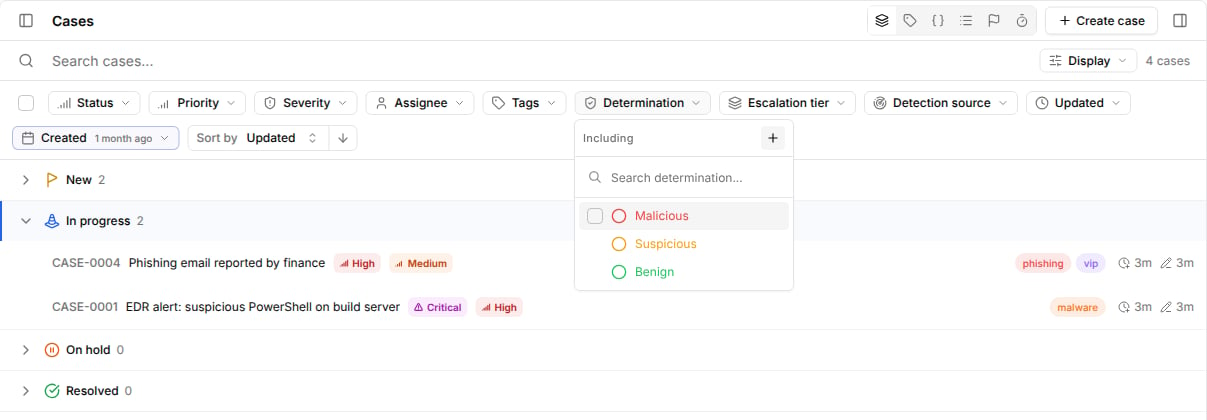
Each dropdown has a fixed set of colored options, appears in the case side panel, and becomes a filter in the case list.
 Use dropdowns for classifications you route or report on, such as determination, escalation tier, queue, business unit, or detection source.
Use a [custom field](/automations/cases/custom-fields) for free-form or numeric data.
## Create a dropdown
1. Go to `Cases` and open the dropdowns view from the header toolbar.
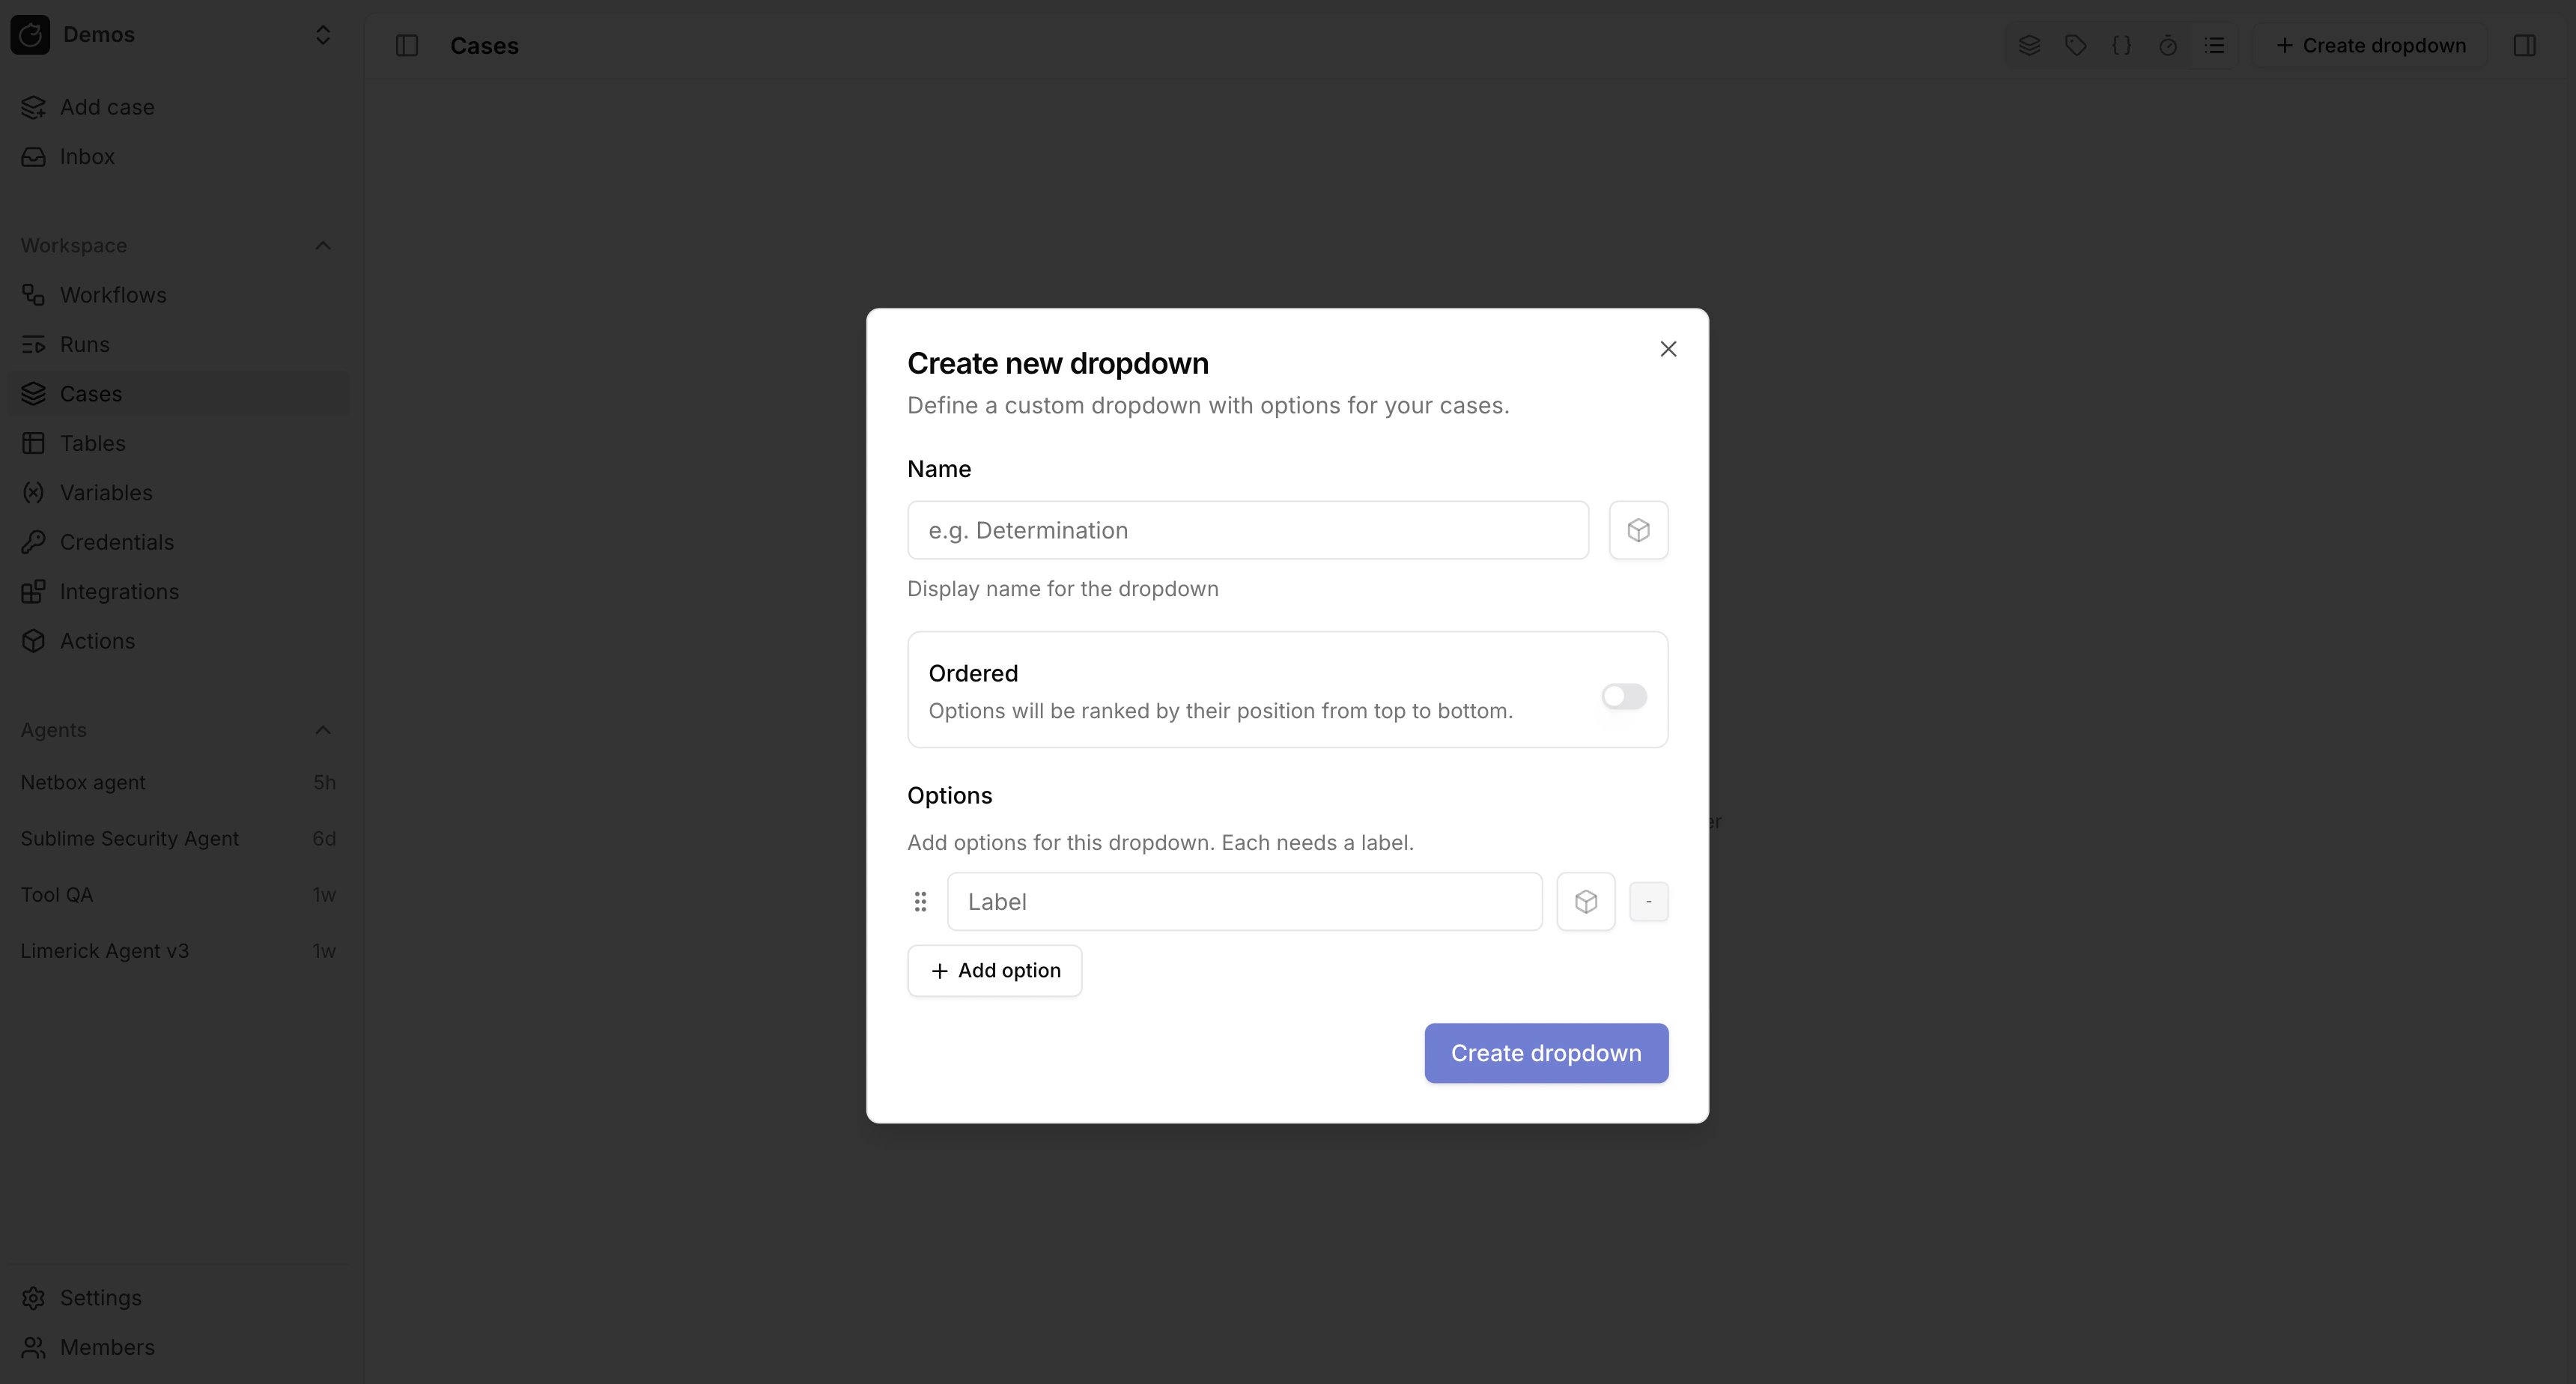
2. Select `Create dropdown`.
3. Enter a name and choose an icon. Tracecat derives the reference from the name, such as `Escalation tier` → `escalation_tier`.
4. Add options. Each option needs a label and can have a color.
5. Turn on `Ordered` when the options form a ranking, such as `Tier 1`, `Tier 2`, and `Tier 3`. Tracecat ranks ordered options by their position from top to bottom.
Use dropdowns for classifications you route or report on, such as determination, escalation tier, queue, business unit, or detection source.
Use a [custom field](/automations/cases/custom-fields) for free-form or numeric data.
## Create a dropdown
1. Go to `Cases` and open the dropdowns view from the header toolbar.
2. Select `Create dropdown`.
3. Enter a name and choose an icon. Tracecat derives the reference from the name, such as `Escalation tier` → `escalation_tier`.
4. Add options. Each option needs a label and can have a color.
5. Turn on `Ordered` when the options form a ranking, such as `Tier 1`, `Tier 2`, and `Tier 3`. Tracecat ranks ordered options by their position from top to bottom.
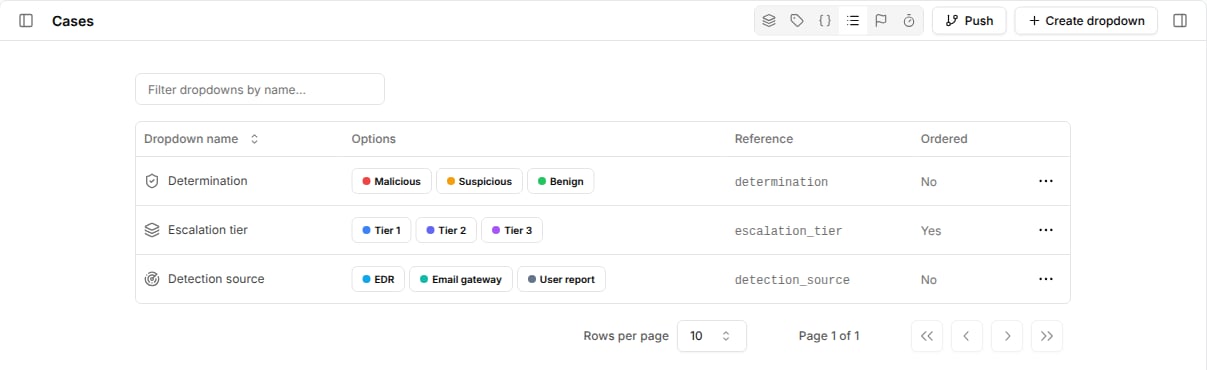
 The dropdowns view lists every dropdown with its options, reference, and whether it is ordered.
Use the row menu to `Copy reference`, `Edit dropdown`, or `Delete dropdown`.
The dropdowns view lists every dropdown with its options, reference, and whether it is ordered.
Use the row menu to `Copy reference`, `Edit dropdown`, or `Delete dropdown`.
 ## Set and filter values
Open a case and pick a value for each dropdown under `Properties` in the side panel.
A case holds at most one option per dropdown.
In the case list, each dropdown appears as a filter next to `Status`, `Priority`, `Severity`, `Assignee`, and `Tags`.
Select one or more options to show matching cases.
## Set values from workflows
Pass `dropdown_values` to `core.cases.create_case` or `core.cases.update_case`.
Each item needs either `definition_ref` or `definition_id`, and either `option_ref` or `option_id`.
Set `option_ref` to `null` to clear a value.
```yaml theme={null}
- ref: classify_case
action: core.cases.update_case
args:
case_id: ${{ TRIGGER.case_id }}
dropdown_values:
- definition_ref: determination
option_ref: malicious
- definition_ref: escalation_tier
option_ref: tier_2
```
Option refs are derived from option labels, such as `Email gateway` → `email_gateway`.
To start a workflow when a dropdown value changes, select `dropdown_value_changed` in a [case trigger](/automations/cases/workflow-triggers).
## Related pages
* See [Closure requirements](/automations/cases/closure-requirements) to require a dropdown value before a case is closed or resolved.
* See [Durations](/automations/cases/durations) to measure time until a dropdown changes to a specific option.
* See [Cases](/automations/core-actions/case-actions/cases) for the full `dropdown_values` input reference.
This documentation is built and hosted on [Mintlify](https://mintlify.com), a developer documentation platform.
## Set and filter values
Open a case and pick a value for each dropdown under `Properties` in the side panel.
A case holds at most one option per dropdown.
In the case list, each dropdown appears as a filter next to `Status`, `Priority`, `Severity`, `Assignee`, and `Tags`.
Select one or more options to show matching cases.
## Set values from workflows
Pass `dropdown_values` to `core.cases.create_case` or `core.cases.update_case`.
Each item needs either `definition_ref` or `definition_id`, and either `option_ref` or `option_id`.
Set `option_ref` to `null` to clear a value.
```yaml theme={null}
- ref: classify_case
action: core.cases.update_case
args:
case_id: ${{ TRIGGER.case_id }}
dropdown_values:
- definition_ref: determination
option_ref: malicious
- definition_ref: escalation_tier
option_ref: tier_2
```
Option refs are derived from option labels, such as `Email gateway` → `email_gateway`.
To start a workflow when a dropdown value changes, select `dropdown_value_changed` in a [case trigger](/automations/cases/workflow-triggers).
## Related pages
* See [Closure requirements](/automations/cases/closure-requirements) to require a dropdown value before a case is closed or resolved.
* See [Durations](/automations/cases/durations) to measure time until a dropdown changes to a specific option.
* See [Cases](/automations/core-actions/case-actions/cases) for the full `dropdown_values` input reference.
This documentation is built and hosted on [Mintlify](https://mintlify.com), a developer documentation platform.