Interested in contributing to the official Tracecat Registry?
Check out the contributing guide on GitHub for more information.All accepted contributions are then maintained by the Tracecat team!
Prerequisites
- A local Tracecat Docker Compose deployment
- Python 3.12
- A python package manager (e.g. pip or uv)
- (Recommended) A new isolated Python environment
Linting
You can safely skip this section if you do not need automatic linting and formatting.
This setup, however, is required for contributors.
cd into the custom-integrations-starter-kit directory, add the following .pre-commit-config.yaml file:
pre-commit-config.yaml
pre-commit-config.yaml
Integrations Starter Kit
The recommended way to start developing custom integrations is to use the integrations starter kit.Create new repo
The first step is to create a new repo from the custom-integrations-starter-kit template.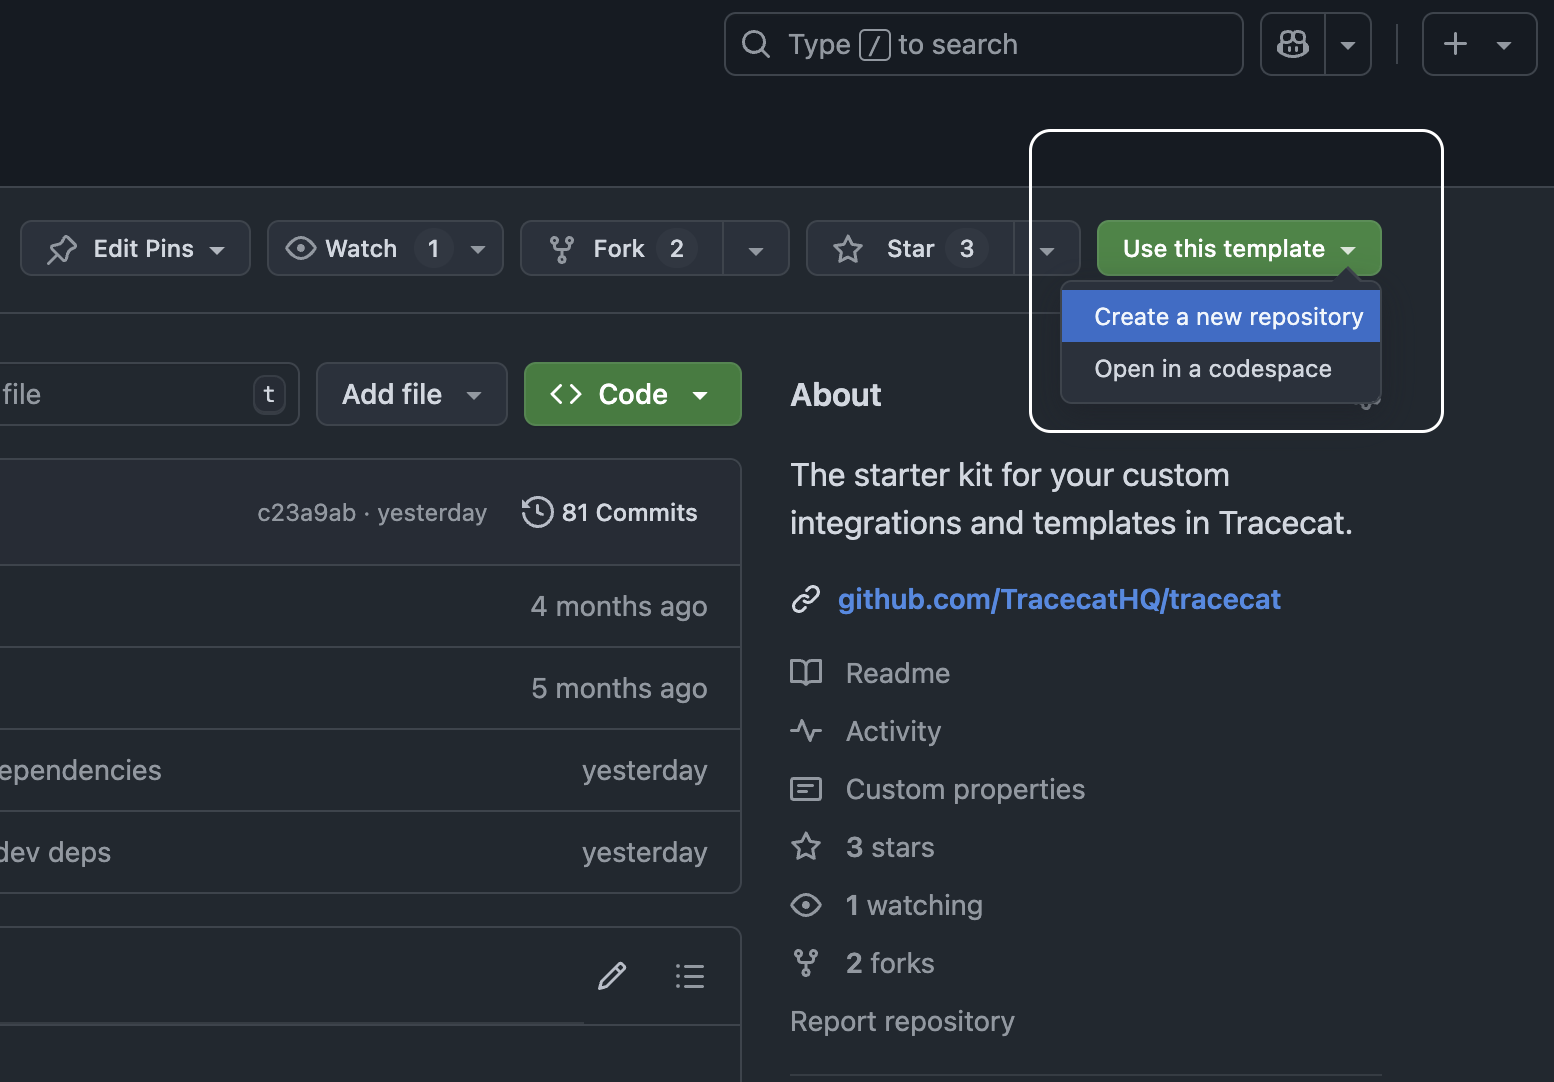
Install package and tracecat_registry
The starter kit is a Python package with a This installs the package and all dependencies from the lock file, ensuring reproducible builds.
The dev dependencies include the
pyproject.toml file.
To install it, run the following command:tracecat and tracecat_registry[cli] Python packages.Find out more about the tracecat_registry package below.Setup development environment
The final step is to link the local registry to your local Tracecat instance.
Step-by-step instructions are available in the development environment section below.
Tracecat Registry
tracecat_registry requires tracecat to be installed.tracecat_registry will give you access to the tc CLI, which is used to validate your templates before syncing and running them in Tracecat.
It also includes the tracecat_registry package, which contains necessary imports for building Tracecat Python UDFs.
Validation CLI
To check if your templates are valid, run the following command: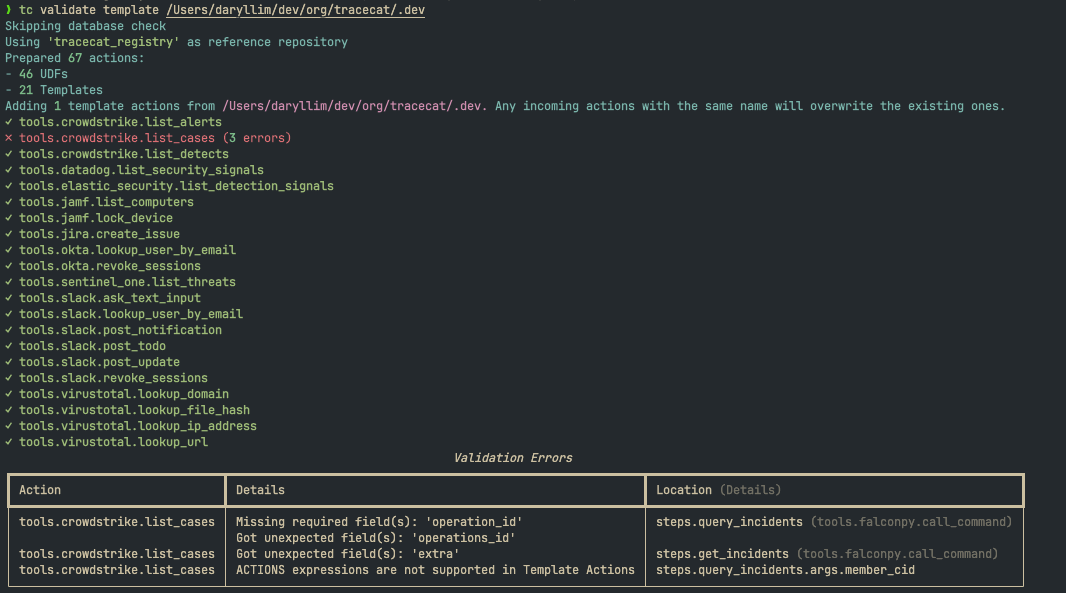
Local testing
registry.register, Annotated, Doc, and RegistrySecret are used to convert your Python function arguments into Tracecat action inputs.
They do not affect the function’s behavior in Python.
You can continue using the function as normal in your scripts and tests.
Development Environment
This tutorial assumes you have a local Tracecat Docker Compose deployment.
.env file: