This tutorial does not cover how to expose your Tracecat instance to the public internet.
- If you’re running Tracecat locally, you’ll need use a tunneling service like ngrok to receive webhook requests from the public internet.
- If you’re running Tracecat on AWS Fargate, Tracecat is automatically exposed to the public internet via an Application Load Balancer.
What you’ll learn
By the end of this tutorial, you’ll learn how to create two types of workflows:- A webhook workflow that receives a JSON string and decodes it using the
FN.deserialize_jsonfunction. - A scheduled workflow that sends a notification to a Slack channel at a regular interval.
Trigger action
Every Tracecat workflow comes with a singleTrigger action.
This trigger action cannot be deleted.
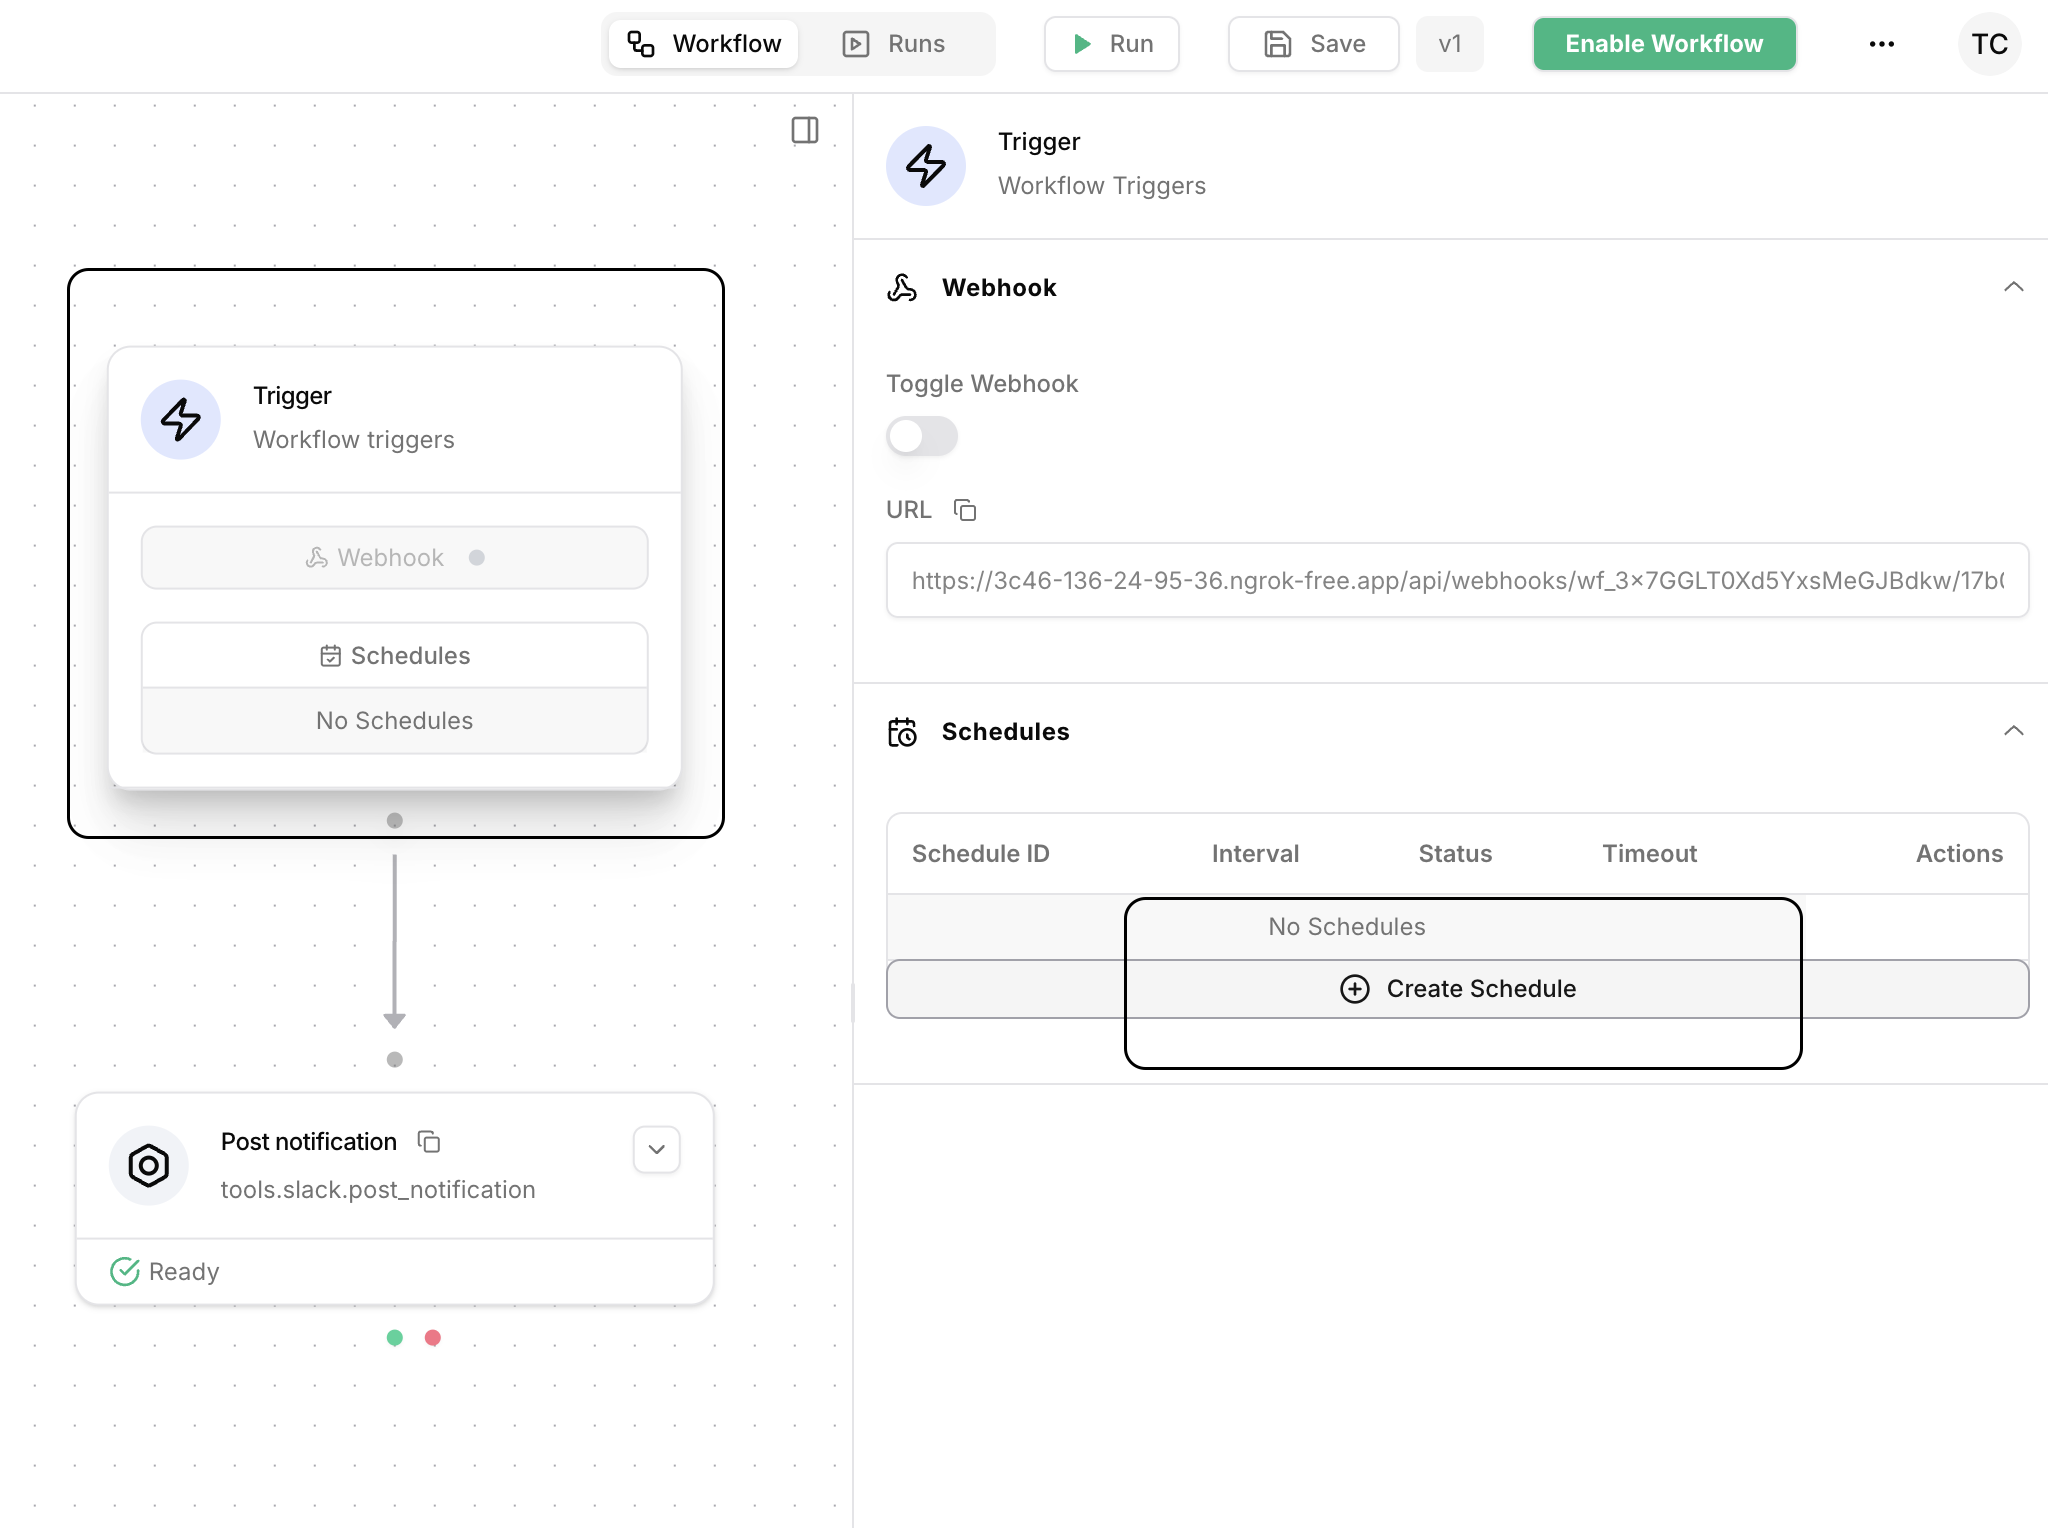
Click on the Trigger action to activate the webhooks and schedules configuration panel.
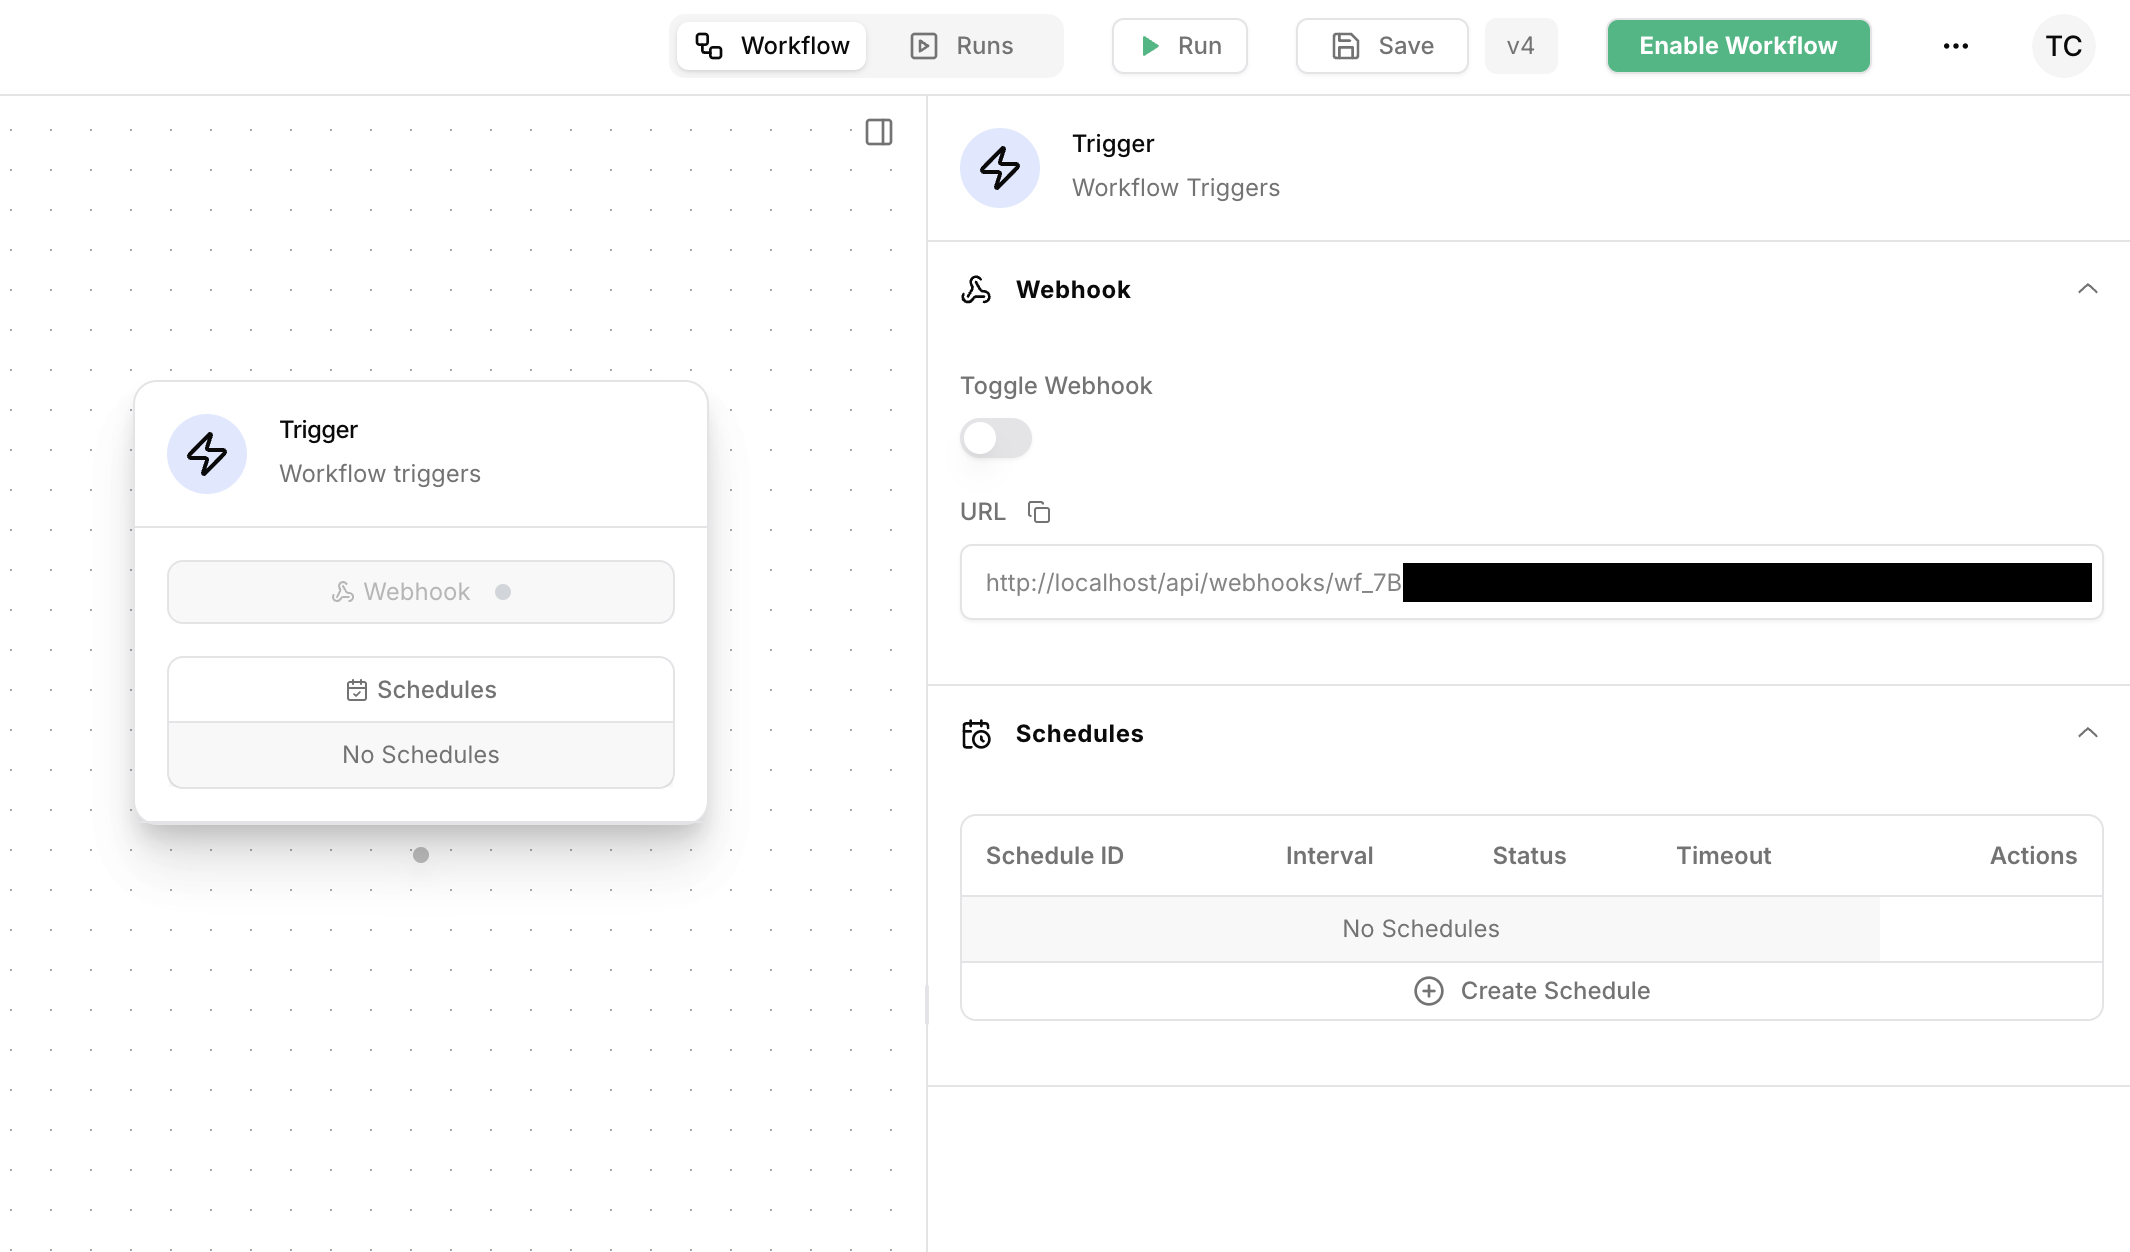
Webhooks
Webhooks are disabled by default. To activate a workflow’s webhook, click on theTrigger action, then toggle the webhook on.
Events can then be triggered by making a POST request to the webhook URL.
Webhook URLs are formatted as:
Authenticate webhook requests with API keys
You can lock down a webhook by requiring callers to present an API key.-
Open the
Triggeraction panel and locate the API Key section. - Click Generate API key. Copy the value when prompted—it is only displayed once.
-
Add the following header to every webhook request:
401 Unauthorized response. You can rotate the key at any time, or revoke
it to temporarily block requests without deleting the configuration.
Restrict webhook sources with IP allowlists
Use IP allowlists to accept requests only from trusted networks.- In the
Triggerpanel, add one or more IPv4 addresses or CIDR ranges (e.g.203.0.113.7or203.0.113.0/24) to the IP Allowlist field. - Click Save to apply the changes.
403 Forbidden response. Leave the list empty to allow
traffic from any source.
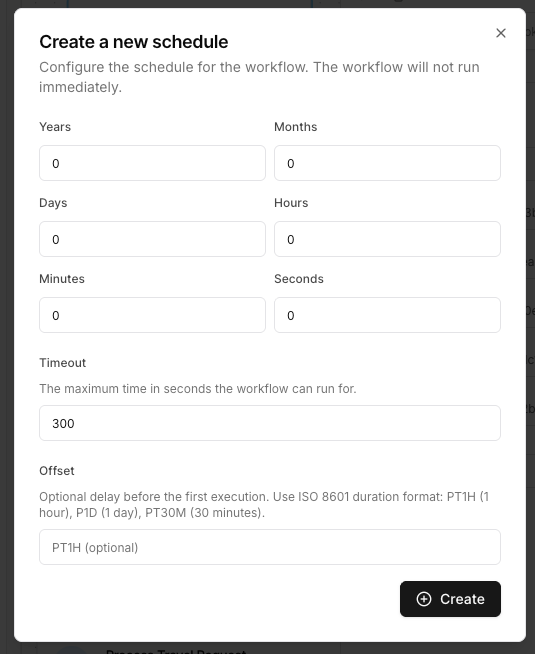
Schedules
Schedules are disabled by default. To activate a workflow’s schedule, click on theTrigger action, then toggle the schedule on.
offset to work with timezone differences.
For example, if you are in America/New_York timezone and want to run a workflow every day at 9AM, you can configure the schedule to run every 1 day with an offset of PT13H. This is because 00:00 UTC is 8PM EDT.
Webhook verification
Some tools (e.g. Slack, Okta) that send webhooks require a specific response after the webhook payload is received. This is used to verify that the webhook was received and processed by Tracecat. To echo the webhook payload back to the server, add the query parameterecho=true to the webhook URL.
execution_id) as the response to the webhook POST request.
To return an empty response with status code 200, set the query parameter empty_echo=true.
Allowed webhook methods
By default, onlyPOST requests are allowed.
To allow other methods, select the trigger action then configure POST and / or GET in the Allowed HTTP Methods section of the action panel.
Vendor-specific webhooks
Can’t find the vendor you’re looking for? Open an issue on
GitHub and we’ll add support
for it.
okta: must allowGETrequests for verification.
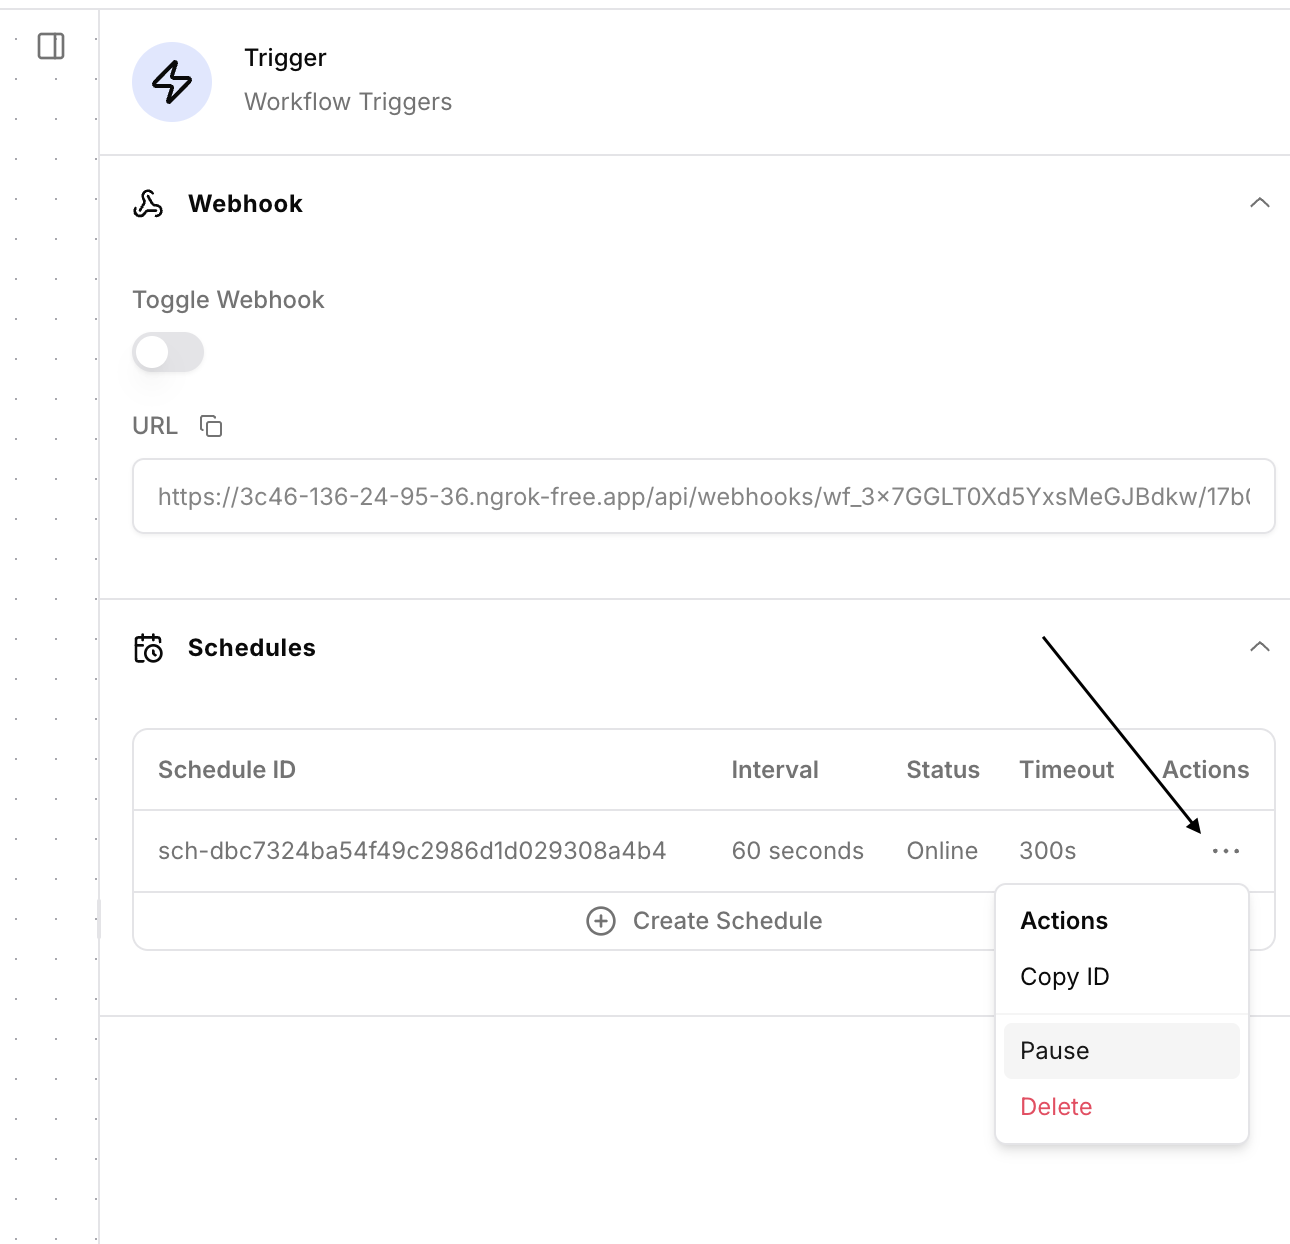
Pause or delete schedule
You can pause or delete the schedule by selecting the schedule menu in theTrigger settings panel.
Reference webhook data
Use the${{ TRIGGER }} expression context to reference data passed via webhooks.
A child workflow also receives input data via ${{ TRIGGER }} context.
Webhook content types
Traceat’s webhook parser supports the followingContent-Type headers:
application/jsonapplication/x-ndjsonapplication/www-form-urlencoded
The webhook sender must set the
Content-Type header to the appropriate
value. If no Content-Type header is set, Tracecat defaults to
application/json.Example: Elastic Security
To ingest alerts from Elastic Security, you’ll need to configure their webhook connector in Kibana to send NDJSON with the expected content type (application/x-ndjson).
Step-by-step guide
Step-by-step guide
Configure Elastic webhook rule action body
Configure the body of the webhook connector to return the alerts in NDJSON format:
Receive webhook in Tracecat
Tracecat looks at the 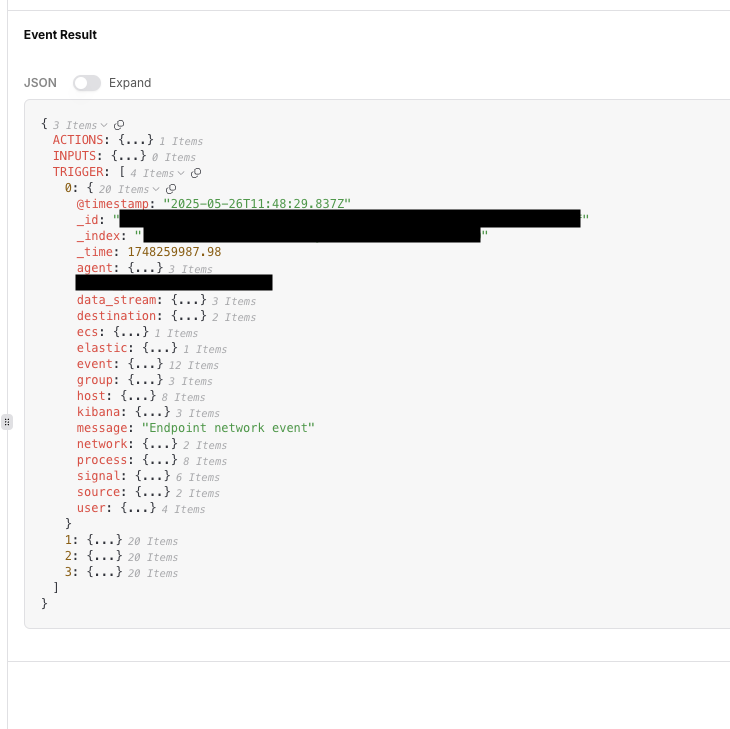
Content-Type header to determine how to parse the webhook payload.
In this case, we’re using application/x-ndjson, so Tracecat will parse the webhook payload as NDJSON.The ${{ TRIGGER }} expression context will return a list of deserialized JSON objects.Parse webhook payload
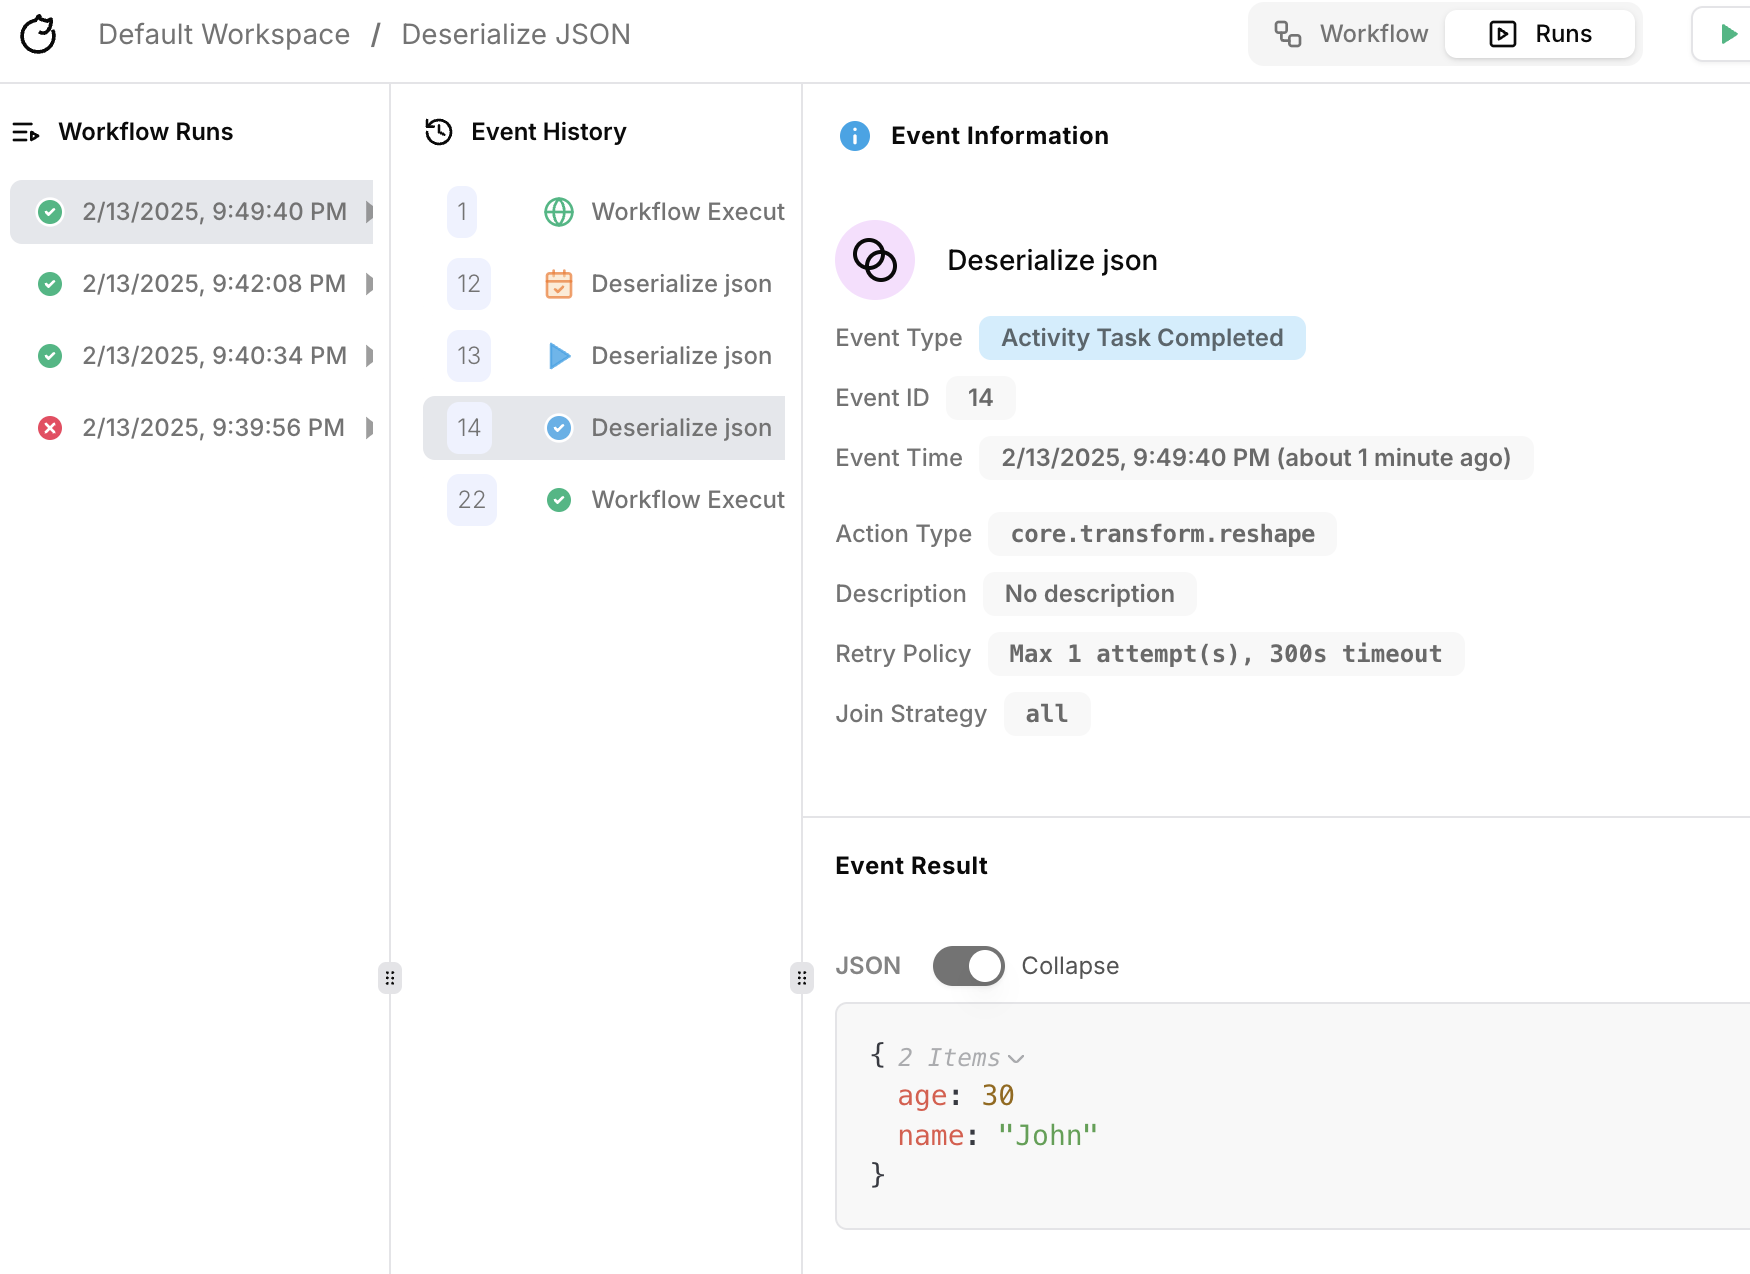
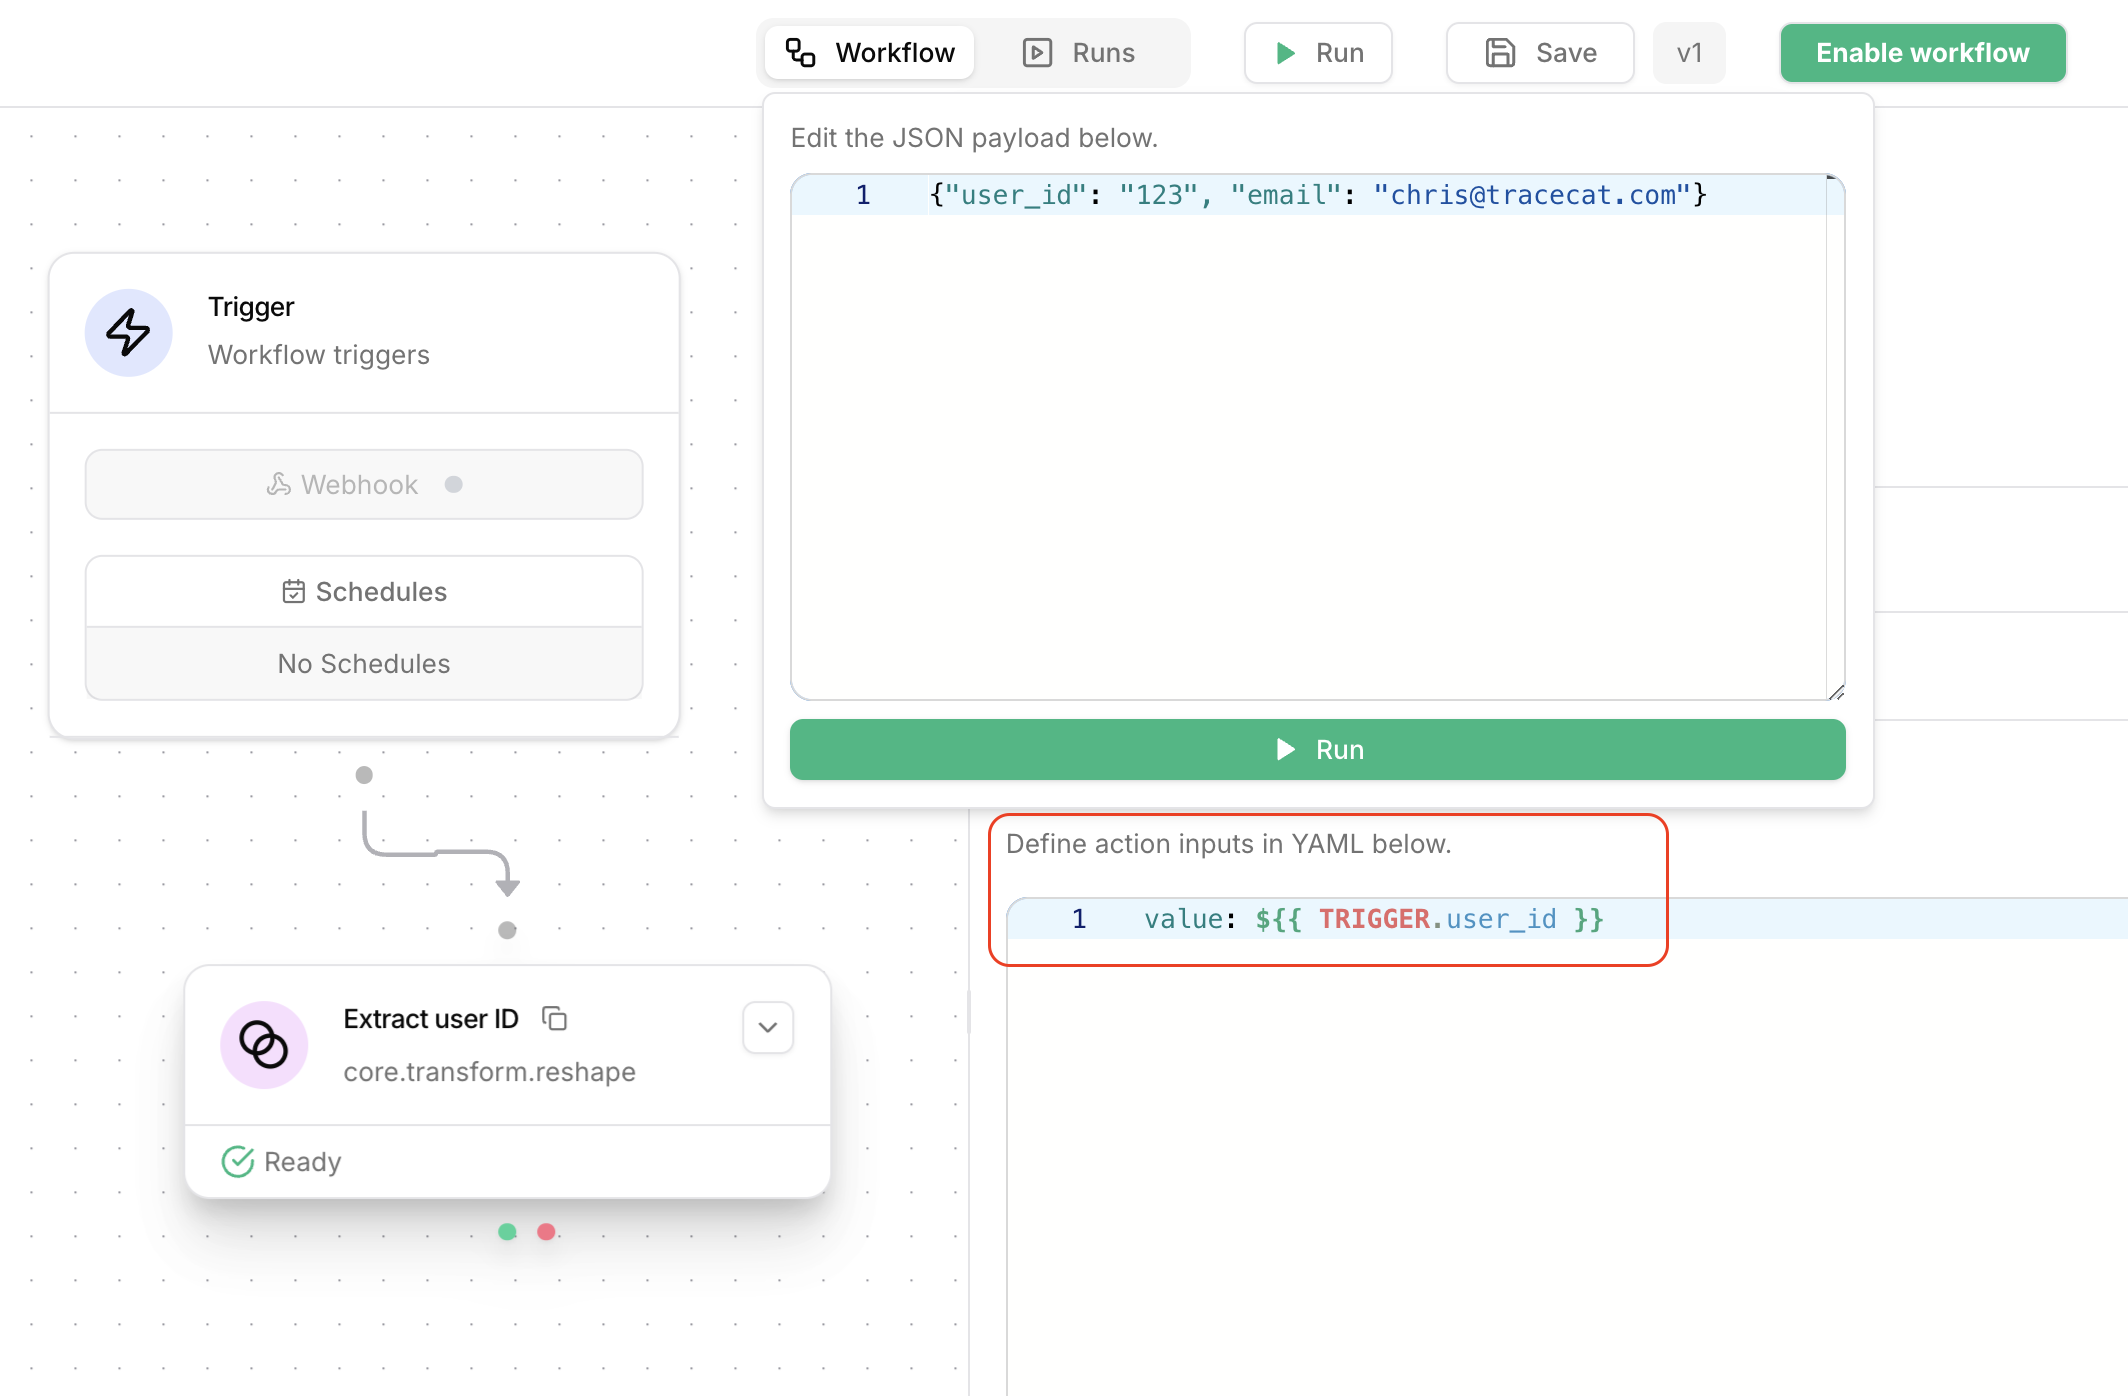
Deserialize JSON action
Add the 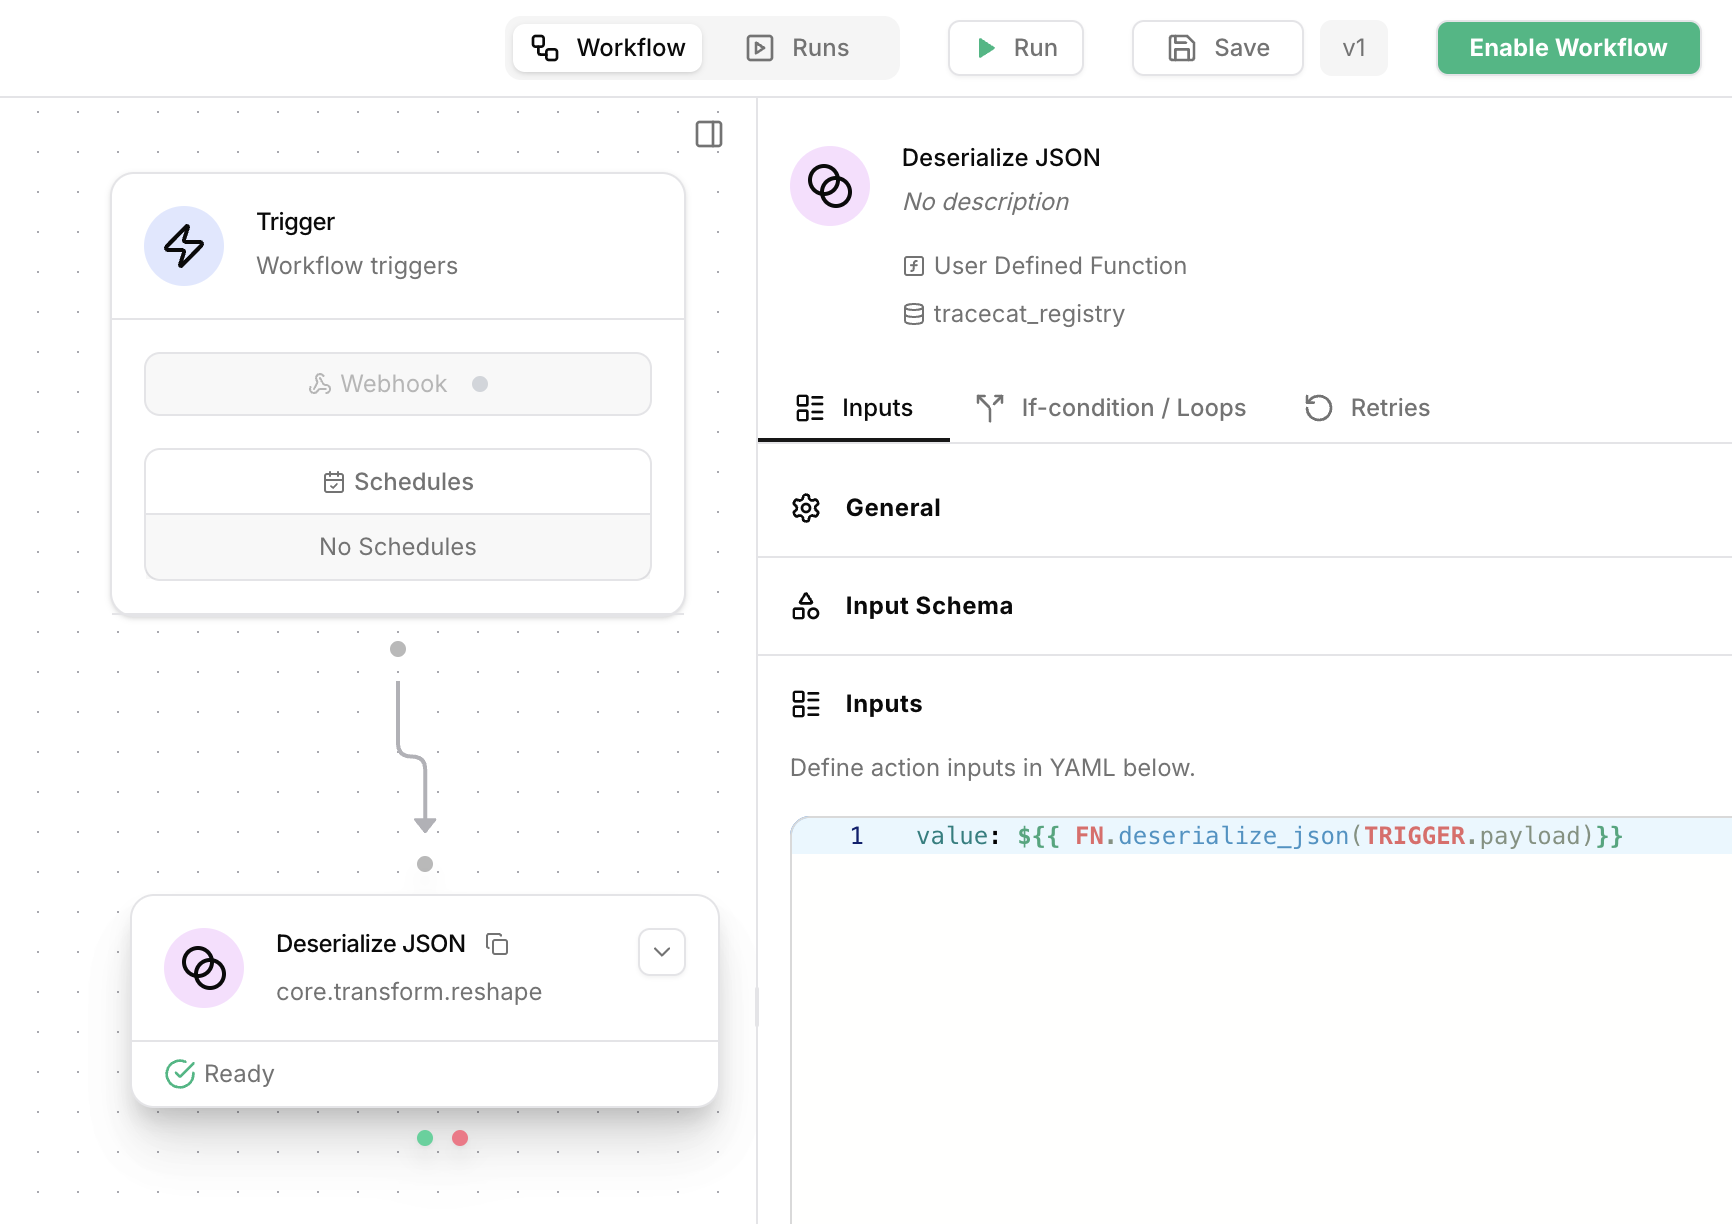
core.transform.reshape action to the workflow.
Use the FN.deserialize_json function to decode an incoming JSON string via webhook.Toggle webhook
Click on the 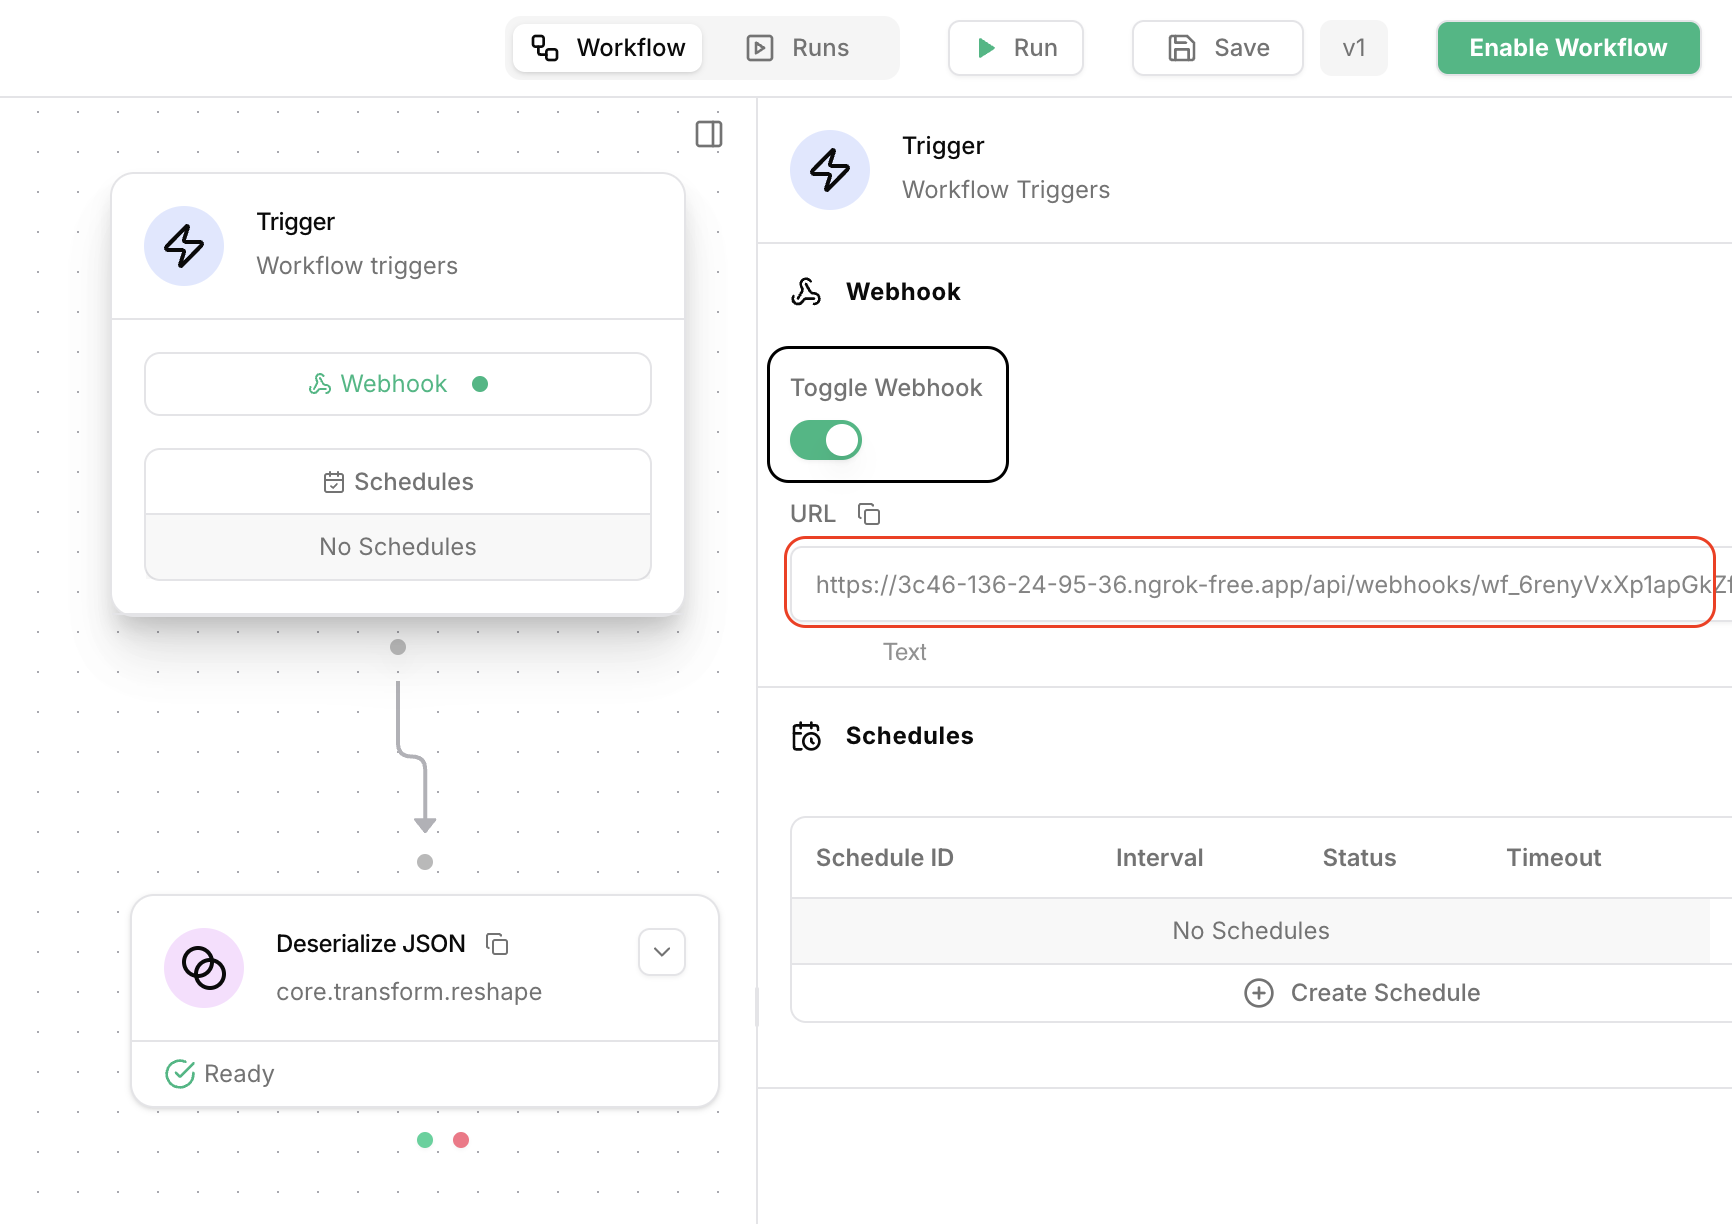
Trigger action.
Enable the webhook by clicking on the toggle switch.
The workflow will now receive webhook events.POST webhook request
Copy the webhook URL to your clipboard, then make a
POST request to the webhook URL.
For example, using curl: