

Overview
SCIM lets your identity provider (IdP) create, update, and remove Tracecat users and sync group membership. You manage it in Organization settings > SCIM. SCIM provisioning requires the access control add-on and theorg:scim:manage scope. Organization owners and admins hold this scope by default.
How provisioning works
- You generate a SCIM token in Tracecat and paste it, with the SCIM base URL, into your IdP.
- Your IdP pushes users and groups. The connection stays pending; these pushes grant no new access until activation.
- You map IdP groups onto Tracecat groups. While the connection is pending, mappings are drafts.
- You review and activate. Tracecat admits active pushed users, revokes their pending invitations, removes inactive pushed users from the organization, and applies the draft mappings.
Connect your identity provider
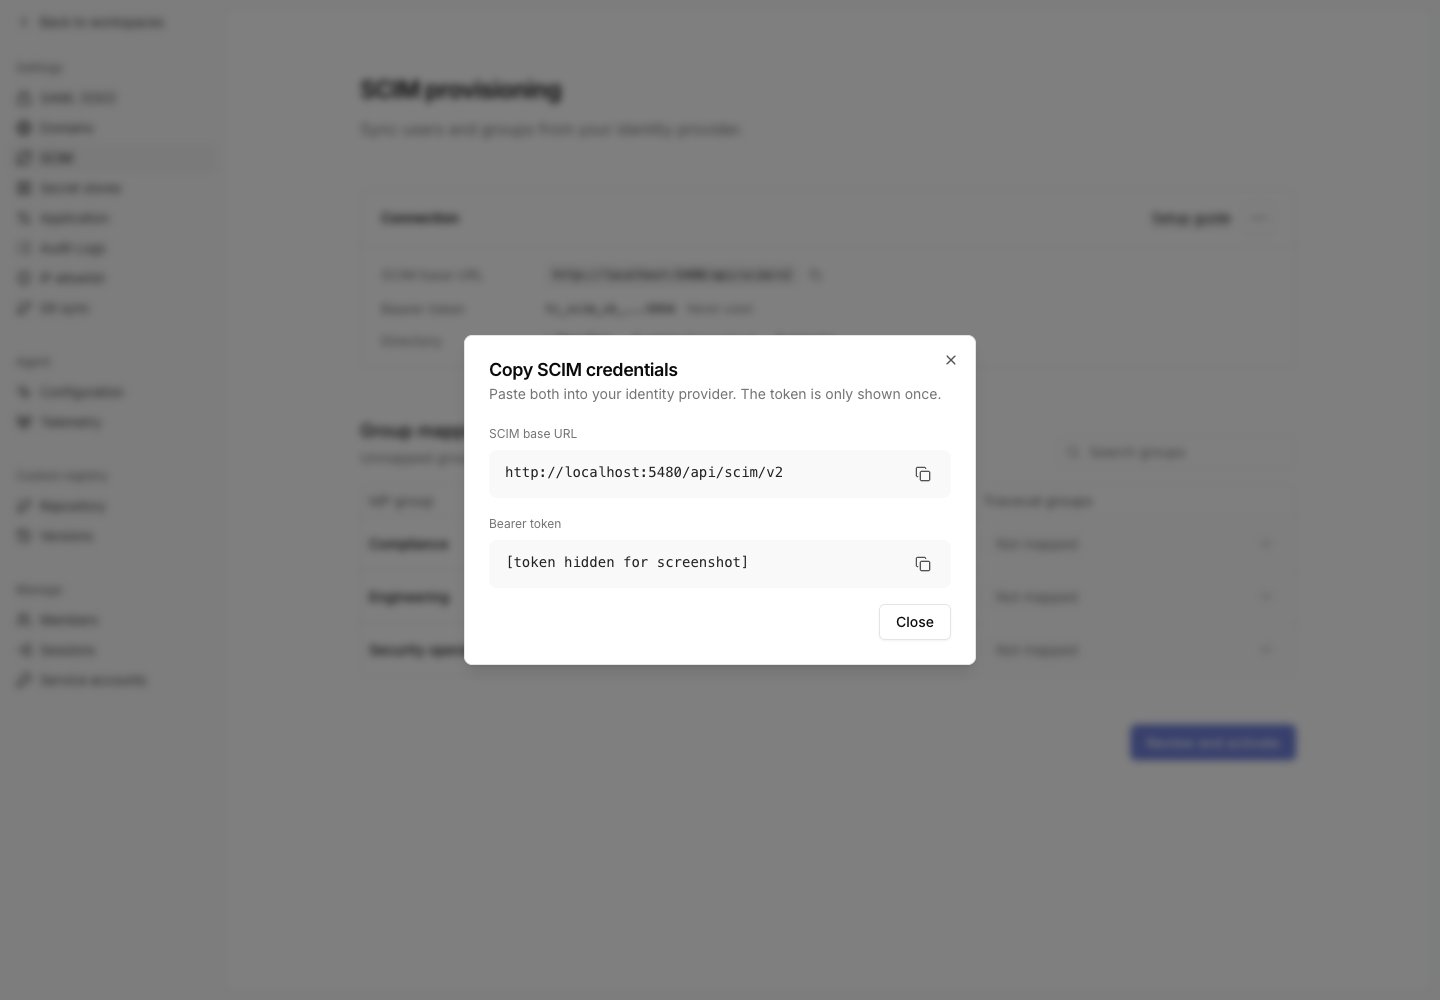
In Organization settings > SCIM, selectGenerate token. The Copy SCIM credentials dialog shows two values:
SCIM base URL:https://<your-tracecat-instance>/api/scim/v2Bearer token: shown once. Copy it before you close the dialog.
Authorization: Bearer <token> on every request. If your organization enforces an IP allowlist, add your IdP’s egress addresses to it; Tracecat rejects SCIM requests from other addresses with 403.
Okta
Okta adds SCIM provisioning to an existing app integration. Create a SAML app for Tracecat first, as described in SAML SSO.1
Enable SCIM on the app
Open the Tracecat app, go to the General tab, and select Edit under App Settings.
Set Provisioning to SCIM and select Save.
2
Configure the connector
Go to the Provisioning tab and select Edit under Settings > Integration.
- Set SCIM connector base URL to your SCIM base URL.
- Set Unique identifier field for users to
userName. - Select Push New Users, Push Profile Updates, and Push Groups.
- Set Authentication Mode to HTTP Header and paste the bearer token into Authorization.
3
Test and save
Select Test Connector Configuration, then Save.
4
Enable provisioning to Tracecat
Under Settings > To App, select Edit and enable Create Users, Update User Attributes, and Deactivate Users.
5
Assign users and push groups
Assign users or groups on the Assignments tab.
On the Push Groups tab, push the groups you want to map in Tracecat.
Microsoft Entra ID
1
Create an enterprise application
In the Microsoft Entra admin center, go to Entra ID > Enterprise apps.
Select New application > Create your own application, choose Integrate any other application you don’t find in the gallery, and select Add.
2
Configure provisioning
Select Provisioning and create a new configuration.
- Set Tenant URL to your SCIM base URL.
- Paste the bearer token into Secret Token.
3
Test the connection
Select Test Connection, then save the configuration.
4
Check the user attribute mapping
Under Attribute mapping, open the user mapping. Tracecat uses
userName as the login email.
If your user principal names differ from email addresses, map userName to mail.5
Assign users and groups
On the Users and groups tab, assign the users and groups to provision.
6
Start provisioning
Go to Overview and select Start provisioning.
Entra ID syncs on a fixed cycle, so pushed users and groups can take up to 40 minutes to appear.
Other providers
Any IdP that speaks SCIM 2.0 with bearer token authentication works. Configure it with:- Base URL: your SCIM base URL.
- Authentication: HTTP header,
Authorization: Bearer <token>. - User identifier:
userName, set to the user’s email address. - Resources:
UsersandGroups.
GET, POST, PUT, PATCH, and DELETE on both resources, userName eq filters on users, and displayName eq filters on groups.
Map groups
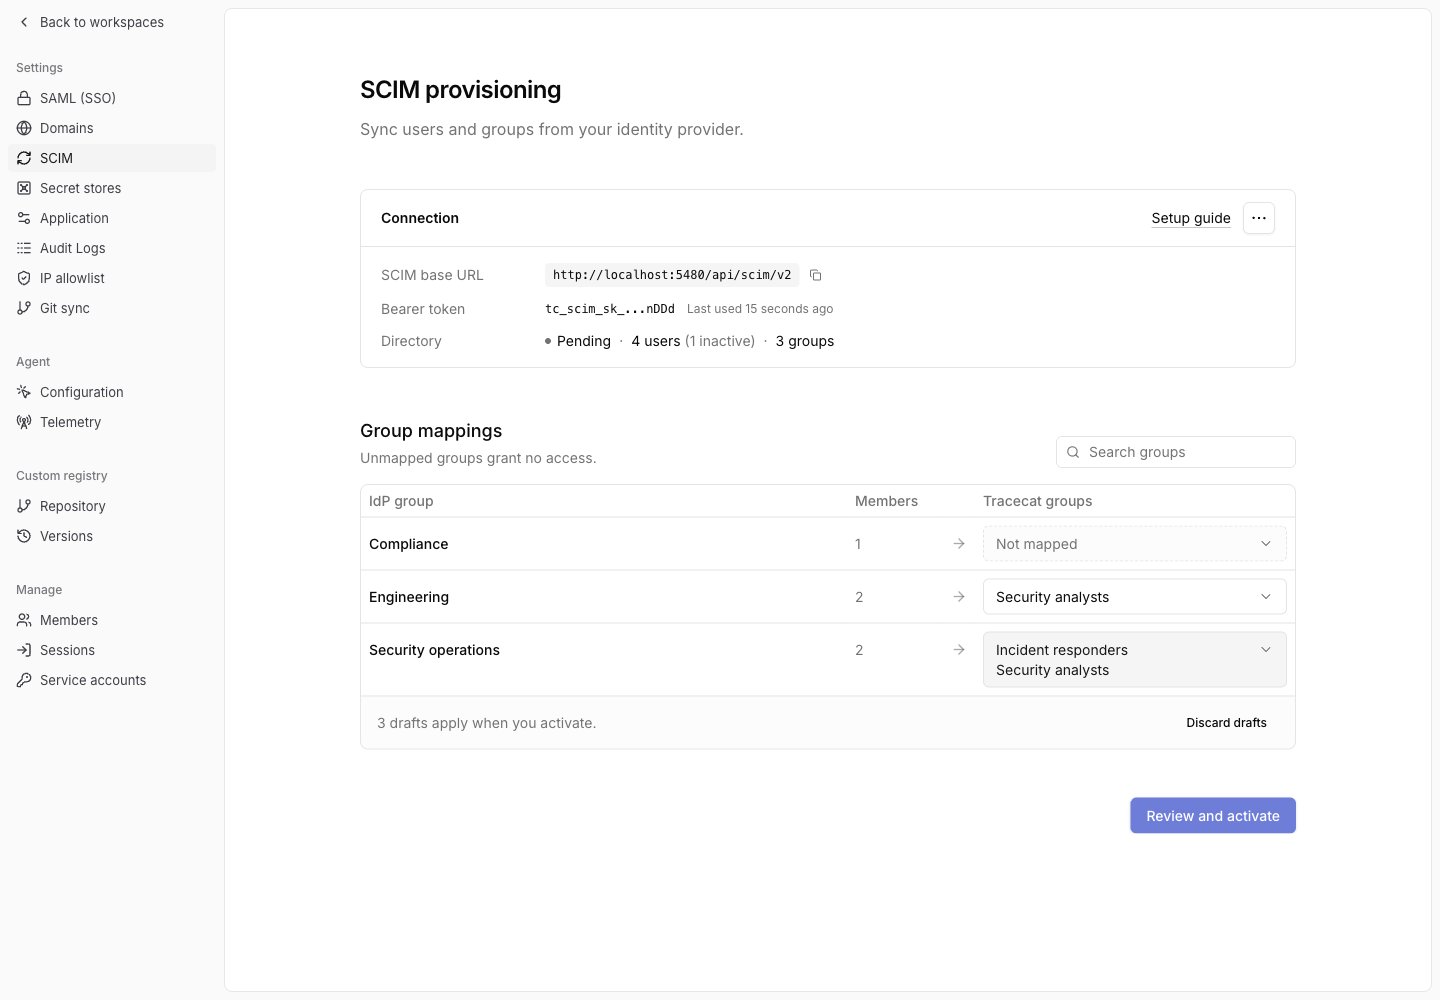
Create your target groups and assign their roles in Custom roles and groups first. TheGroup mappings table lists pushed IdP groups, with an arrow pointing to each group’s Tracecat targets. The Connection card shows the directory’s user, inactive-user, and group counts.
- Find your IdP group in the table. Use
Load more groupswhen available;Search groupsfilters the groups already loaded. - Open the dropdown in the
Tracecat groupscolumn and select one or more target groups. Each selected target appears by name, in alphabetical order. Select a checked group again to remove that mapping. - Check the draft count below the table. Select
Discard draftsto undo your changes.
- Manual members who are also in the IdP group keep access through the IdP group.
- Manual members who are not in the IdP group lose access through that Tracecat group.
- Access from other roles and groups is unchanged.
Show all to load everyone.
Removing the last mapping for a Tracecat group keeps its current members as manual members. Removing one of several mappings removes only the members that mapping supplied.
Review and activate
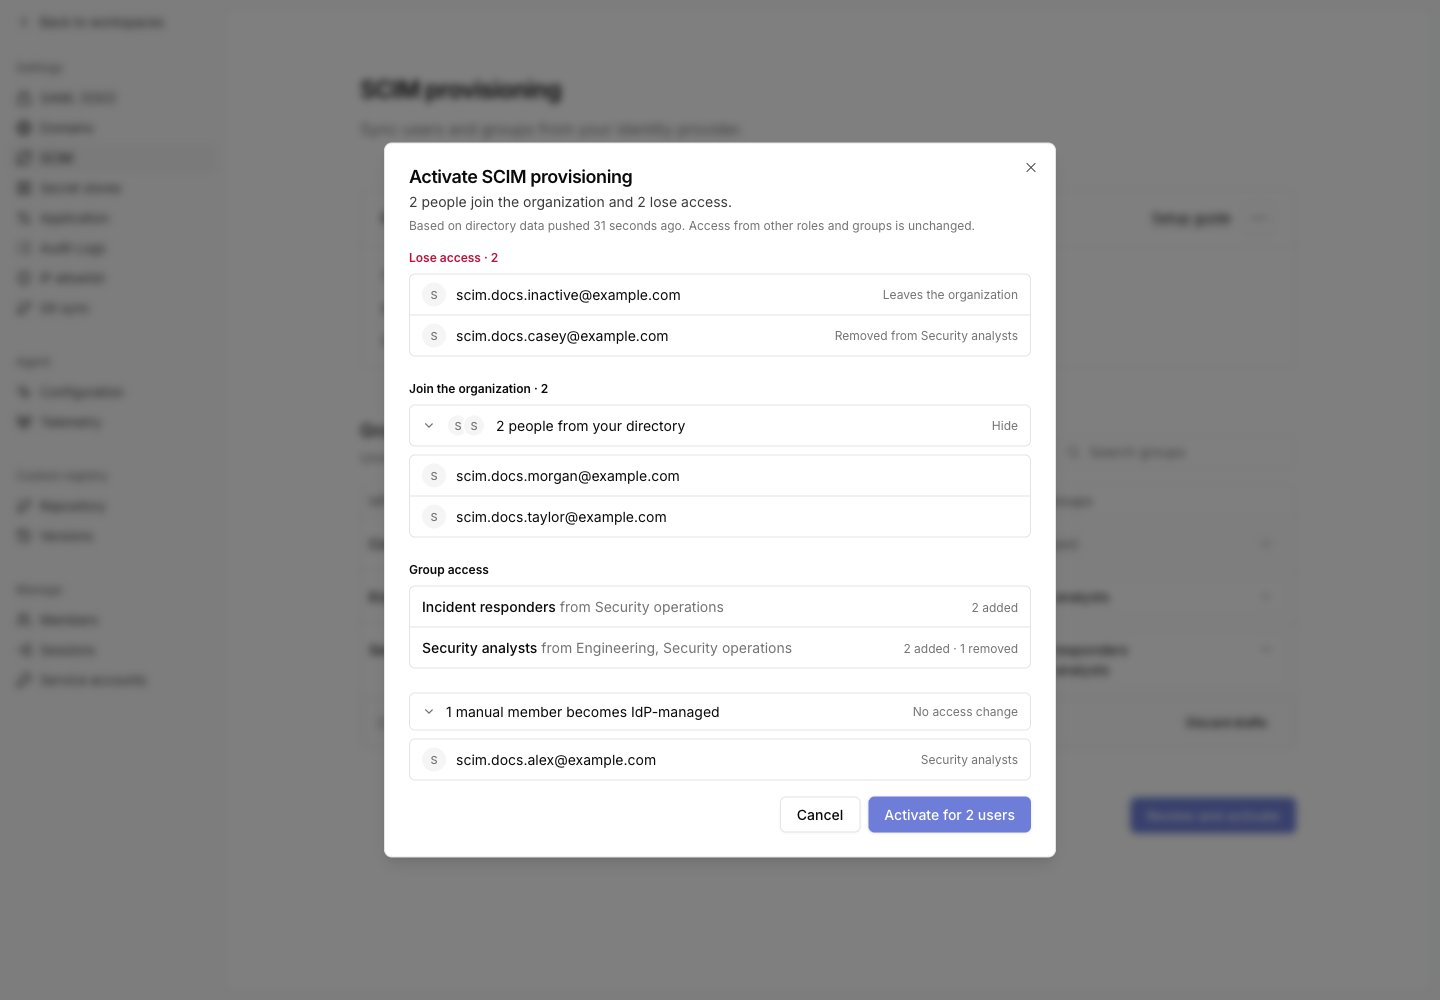
While the status isPending, select Review and activate at the bottom of the page.
- Check
Lose accessfor inactive users who will leave the organization and members who will lose a Tracecat group. - Expand
Join the organizationto see the active users activation admits. - Review
Group accessfor each Tracecat group’s added and removed member counts. - Select
Activate for N usersto apply the directory and mappings together.
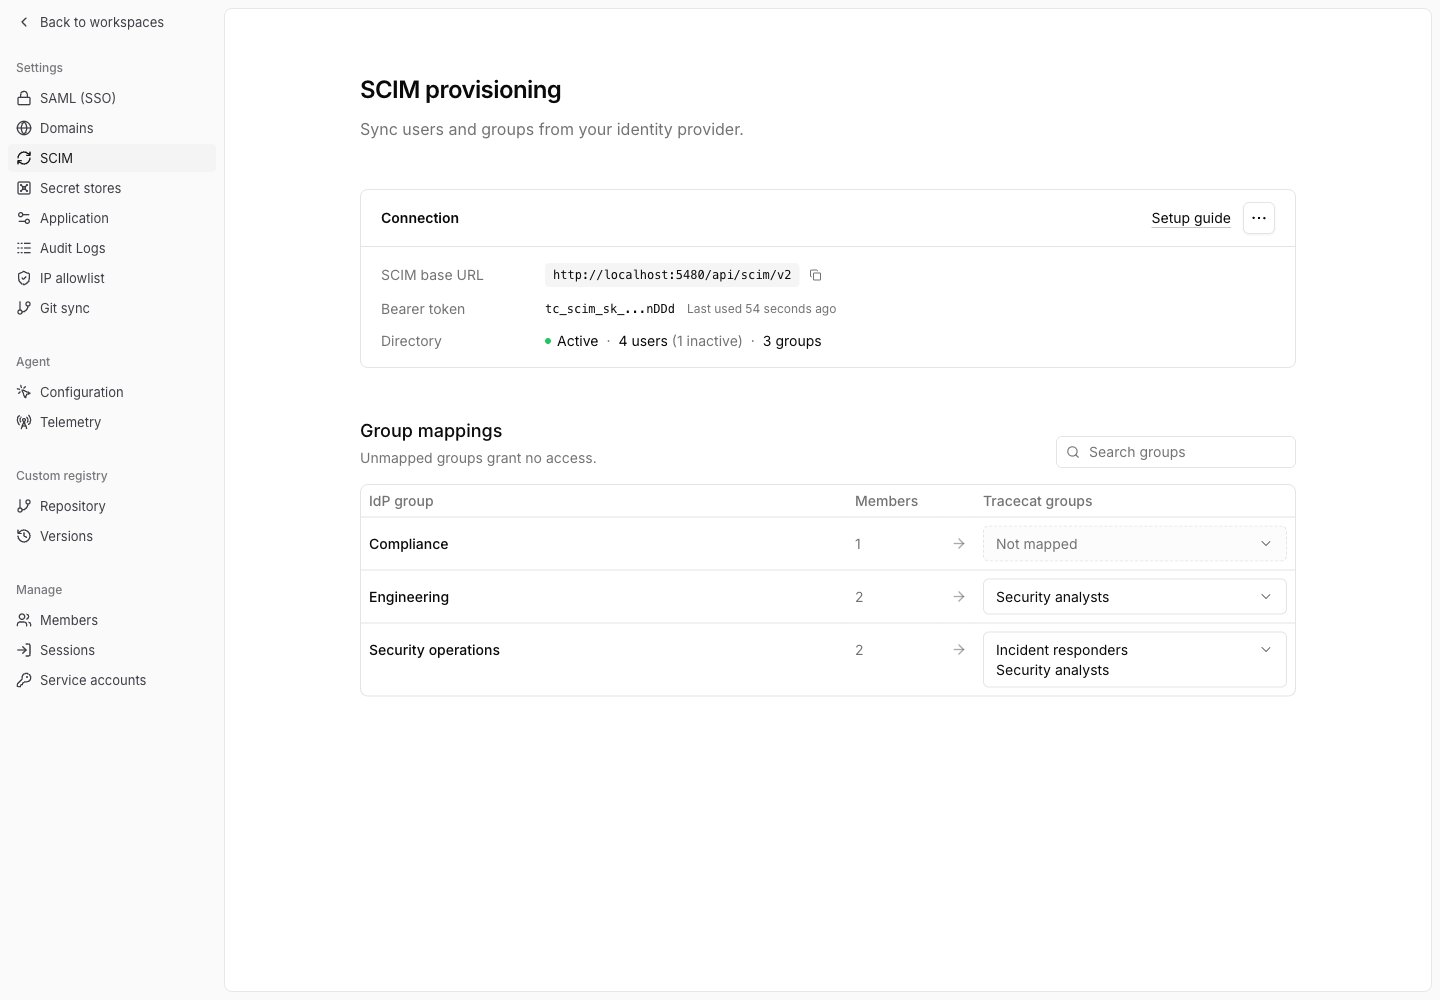
Active. Subsequent IdP pushes apply as they arrive.
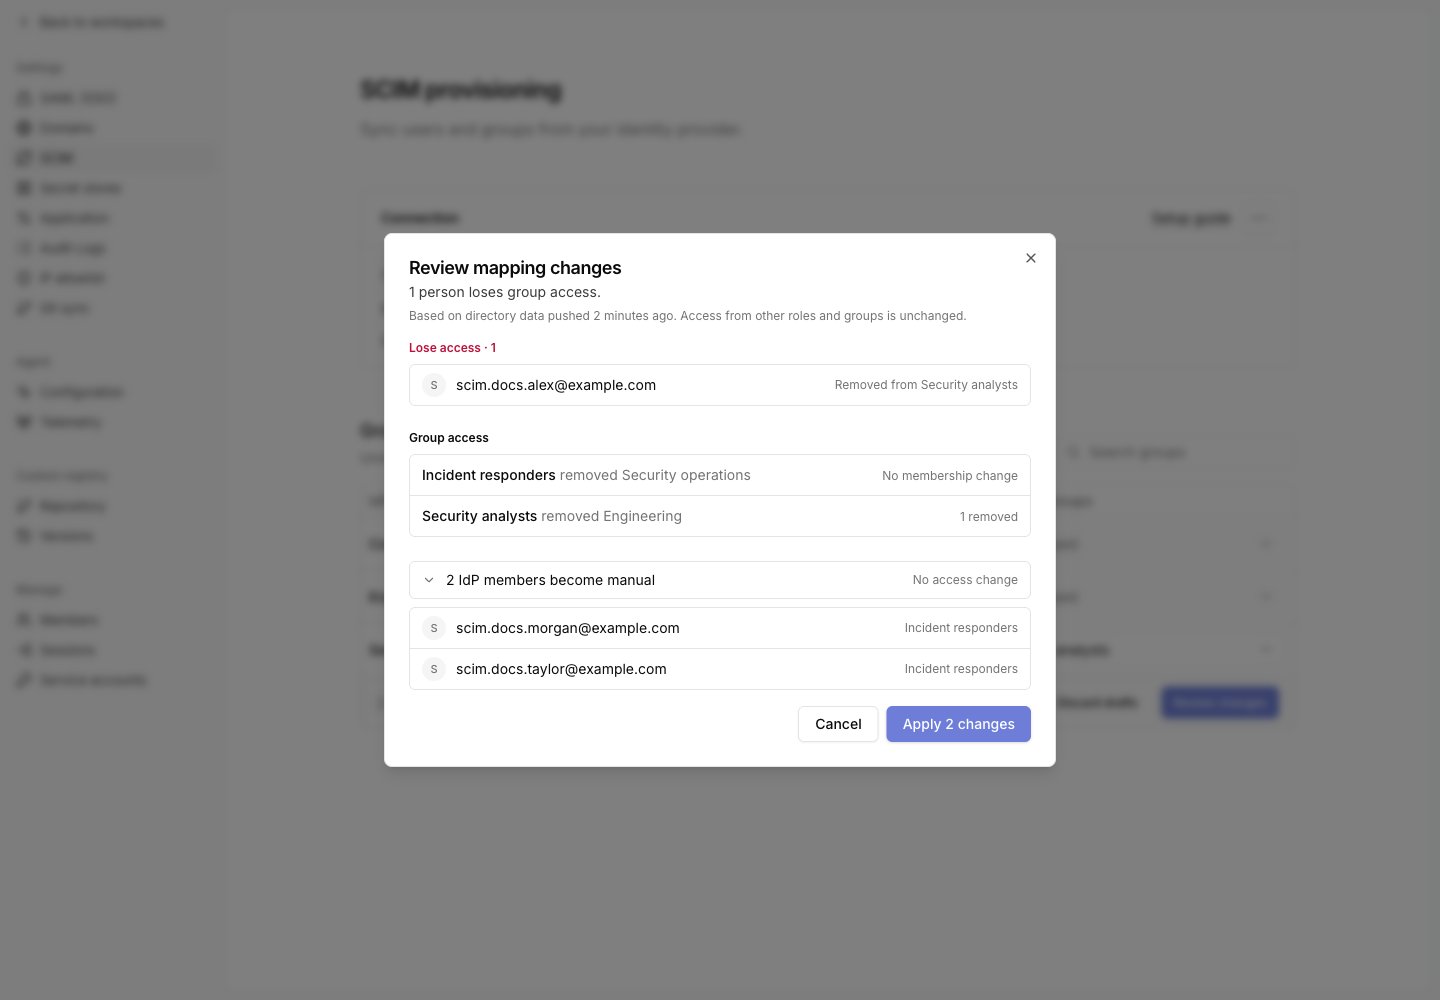
Change active mappings
Use the same group dropdowns to add or remove mappings. Changes stay as drafts until you selectReview changes below the table.
Check who loses access and each Tracecat group’s added and removed member counts, then select Apply N changes. Select Cancel to return to your drafts.
Deprovisioning
When your IdP deactivates a user, setsactive to false, or deletes the user, Tracecat removes that user from this organization. The user keeps any membership in other organizations.
Manage the connection
Open the three-dotConnection actions menu in the Connection card.
- Rotate token: issues a new token. The current token stops working immediately, so provisioning fails until you paste the new token into your IdP.
- Disconnect: revokes the token, removes every group mapping, deletes the SCIM records for the users and groups your IdP pushed, and marks the connection disconnected. Members of mapped groups stay as manual members, and pushed users stay in the organization. To reconnect, generate a new token, push users and groups from your IdP again, then review and activate.
Limitations
- Changing
userNamerenames the user’s Tracecat sign-in email in every organization. The new address must be at a domain this organization owns and unused by another account, and any primaryemailsvalue must equaluserName. - Tracecat rejects provisioning or renaming a platform superuser with
403. Leave superusers out of your IdP’s SCIM assignment; they keep signing in without SCIM. - Bulk operations, sorting, ETags, and password changes are not supported.
- Each organization has one SCIM connection.
Related pages
- See SAML SSO to set up sign-in for the users you provision.
- See Custom roles and groups to create the Tracecat groups you map IdP groups onto.